Contents
- Preferences
- Header
- The AI Node
- The Browser Node
- The Dashboards Node
- The Debugger Node
- The ERD Tool Node
- The Editor Node
- The Graphs Node
- The Miscellaneous Node
- The Paths Node
- The Query Tool Node
- The Schema Diff Node
- The Storage Node
- Manage Preferences
- Get Preferences
- Save Preferences
- Updating Preferences preferences.json
- JSON format
- Getting Started
- Deployment
- Login Page
- Enabling two-factor authentication (2FA)
- User Management
- Change Ownership Dialog
- Change User Password Dialog
- Lock/Restore Account
- Enabling LDAP Authentication
- Enabling Kerberos Authentication
- Enabling OAUTH2 and OIDC Authentication
- Enabling Webserver Authentication
- User Interface
- Menu Bar
- Toolbar
- Object Explorer Filter
- Tabbed Browser
- Tree Control
- Preferences
- Keyboard Shortcuts
- Search objects
- External database for pgAdmin user settings
- Connecting To A Server
- Managing Cluster Objects
- Managing Database Objects
- Creating or Modifying a Table
- Management Basics
- Backup and Restore
- Developer Tools
- Processes
- pgAgent
- pgAdmin Project Contributions
- Release Notes
- Licence
Preferences
Use options in the Preferences tab to customize the behavior of the client. To open the Preferences tab, select Preferences from the File menu or click on the Settings button at the bottom left corner in case of Workspace layout.
Header

Use the Save button to save any preference changes.
Use the Reset all preferences button to restore all preferences to their default values.
Use the Help button to open preferences help.
Quickly search all preferences using the Search box. It finds matches in both labels and help messages.
The left pane of the Preferences tab displays a tree control; each node of the tree control provides access to options that are related to the node under which they are displayed.
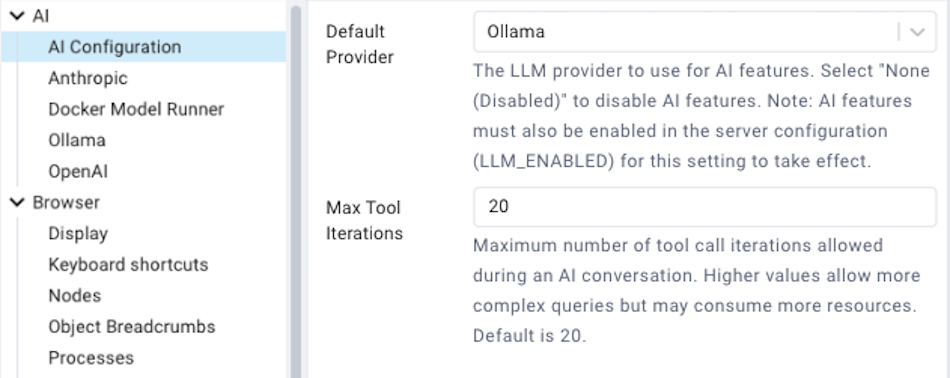
The AI Node
Use preferences found in the AI node of the tree control to configure AI-powered features and LLM (Large Language Model) providers.
Note: AI features must be enabled in the server configuration (LLM_ENABLED = True
in config.py) for these preferences to be available.
Use the fields on the AI panel to configure your LLM provider:
Use the Default Provider drop-down to select your LLM provider. Options include: Anthropic, OpenAI, Ollama, or Docker Model Runner.
Anthropic Settings:
Use the API URL field to set a custom API endpoint URL. Leave empty to use the default Anthropic API (
https://api.anthropic.com/v1). Set a custom URL to use an Anthropic-compatible API provider.Use the API Key File field to specify the path to a file containing your Anthropic API key. This path refers to the filesystem where the pgAdmin server is running (e.g., inside the container if using Docker). The
~prefix is expanded to the home directory of the user running the pgAdmin server process. The API key may be optional when using a custom API URL with a provider that does not require authentication.Use the Model field to select from the available Claude models. Click the refresh button to fetch the latest available models from your configured endpoint.
OpenAI Settings:
Use the API URL field to set a custom API endpoint URL. Leave empty to use the default OpenAI API (
https://api.openai.com/v1). Set a custom URL to use any OpenAI-compatible API provider (e.g., LiteLLM, LM Studio, EXO). Include the/v1path prefix if required by your provider (e.g.,http://localhost:1234/v1).Use the API Key File field to specify the path to a file containing your OpenAI API key. This path refers to the filesystem where the pgAdmin server is running (e.g., inside the container if using Docker). The
~prefix is expanded to the home directory of the user running the pgAdmin server process. The API key may be optional when using a custom API URL with a provider that does not require authentication.Use the Model field to select from the available GPT models. Click the refresh button to fetch the latest available models from your configured endpoint.
Ollama Settings:
Use the API URL field to specify the Ollama server URL (default:
http://localhost:11434).Use the Model field to select from the available models or enter a custom model name (e.g.,
llama2,mistral). Click the refresh button to fetch the latest available models from your Ollama server.
Docker Model Runner Settings:
Use the API URL field to specify the Docker Model Runner API URL (default:
http://localhost:12434). Available in Docker Desktop 4.40+.Use the Model field to select from the available models or enter a custom model name. Click the refresh button to fetch the latest available models from your Docker Model Runner.
Note
You can also use the OpenAI provider with a custom API URL for any OpenAI-compatible endpoint, including Docker Model Runner, LM Studio, EXO, and other local inference servers. This can be useful when you want to use a provider that isn’t explicitly listed but supports the OpenAI API format.
The Browser Node
Use preferences found in the Browser node of the tree control to personalize your workspace.
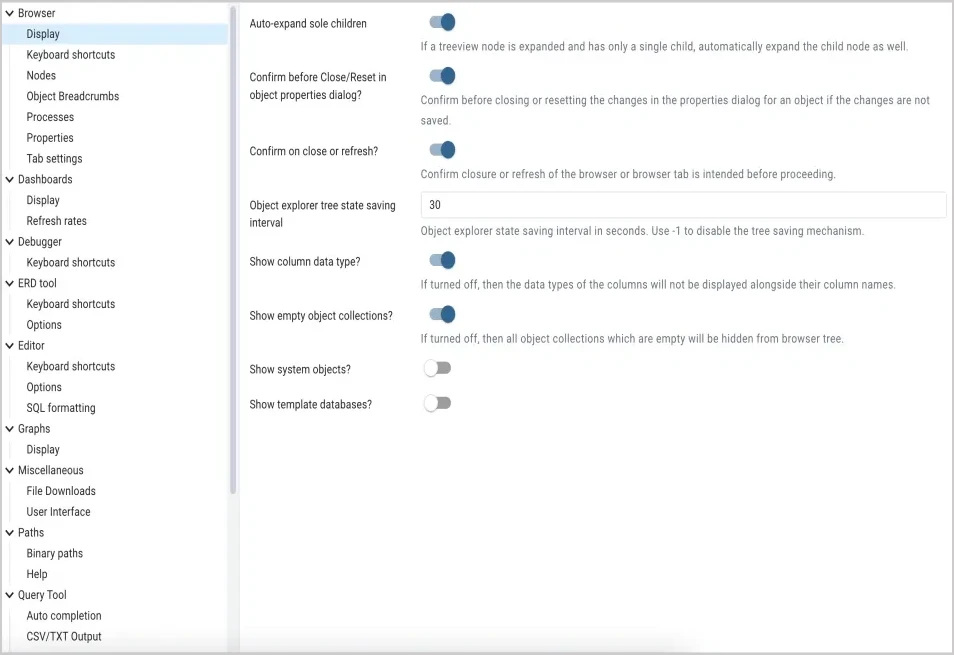
Use the fields on the Display panel to specify general display preferences:
When the Auto-expand sole children switch is set to True, child nodes will be automatically expanded if a treeview node is expanded and has only a single child.
When the Confirm before Close/Reset in object properties dialog? switch is set to True, pgAdmin will warn you before closing the properties dialog of an object if there are any unsaved changes. On user confirmation, the properties dialog will close.
When the Confirm on close or refresh? switch is set to True, pgAdmin will attempt to catch browser close or refresh events and prompt before allowing them to continue.
Use the Object explorer state saving interval field to set the treeview state saving interval. A value of -1 will disable the treeview state saving functionality.
When the Hide shared servers? switch is set to True, the client will hide all the shared servers from the object explorer. Note: This option is visible only when pgAdmin is running in server mode.
When the Show column data type? switch is turned off, then the data types of the columns will not be displayed alongside their column names.
When the Show empty object collections? switch is turned off, then all object collections which are empty will be hidden from browser tree.
When the Show system objects? switch is set to True, the client will display system objects such as system schemas (for example, pg_temp) or system columns (for example, xmin or ctid) in the tree control.
When the Show template databases? switch is set to True, the client will display template databases.
Use the fields on the Keyboard shortcuts panel to configure shortcuts for the main window navigation:

The panel displays a list of keyboard shortcuts available for the main window; select the combination of the modifier keys along with the key to configure each shortcut.
Use the fields on the Nodes panel to select the object types that will be displayed in the Browser tree control:
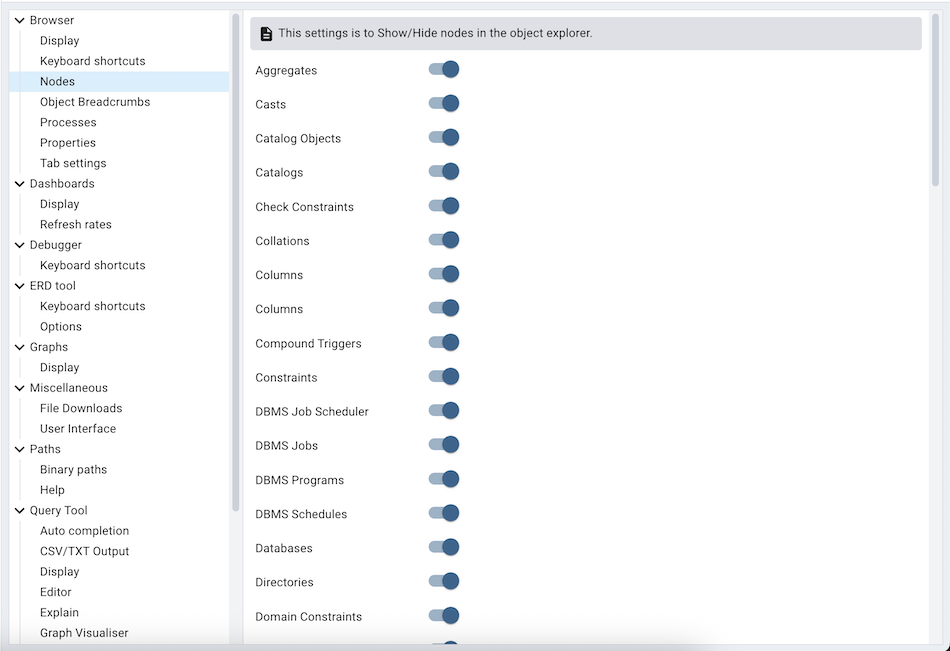
The panel displays a list of database objects; slide the switch located next to each object to Show or Hide the database object. When querying system catalogs, you can reduce the number of object types displayed to increase speed.
Use the fields on the Object Breadcrumbs panel to change object breadcrumbs related settings:
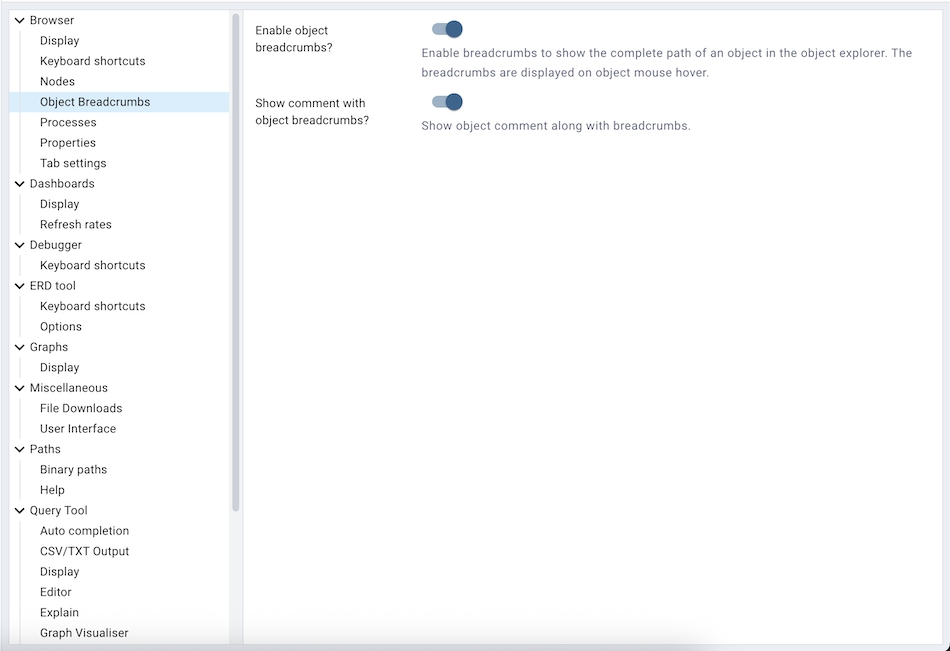
Use Enable object breadcrumbs? to enable or disable object breadcrumbs displayed on object mouse hover.
Use Show comment with object breadcrumbs? to enable or disable the comment visibility which comes displayed with object breadcrumbs.
Use the fields on the Processes panel to change processes tab related settings:

Change Process details/logs retention days to the number of days, the process info and logs will be automatically cleared.
Use fields on the Properties panel to specify browser properties:
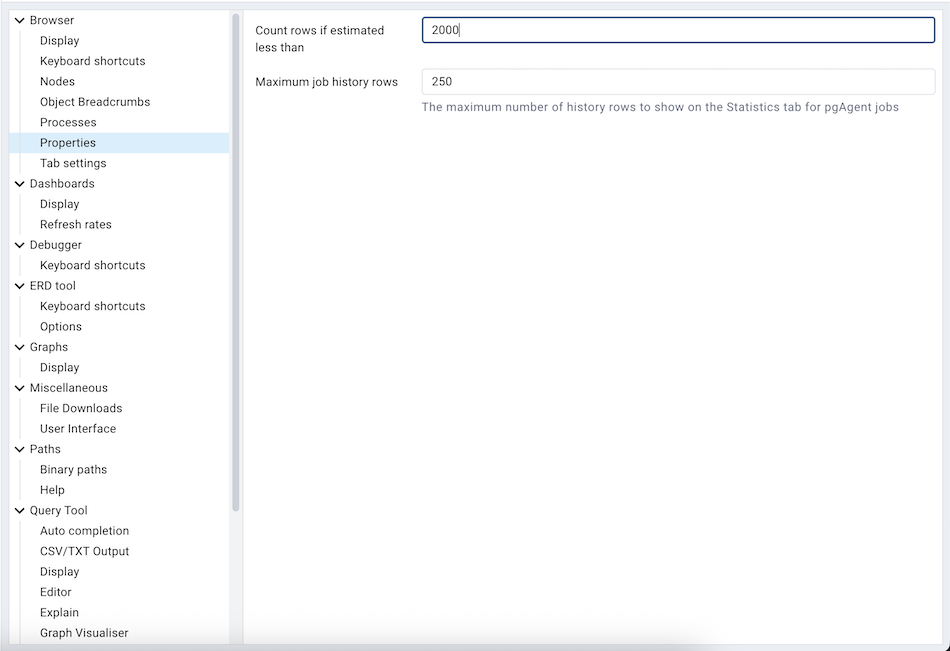
Include a value in the Count rows if estimated less than field to perform a SELECT count(*) if the estimated number of rows in a table (as read from the table statistics) is below the specified limit. After performing the SELECT count(*), pgAdmin will display the row count. The default is 2000.
Provide a value in the Maximum job history rows field to limit the number of rows to show on the statistics tab for pgAgent jobs. The default is 250.
Use field on Tab settings panel to specify the tab related properties.
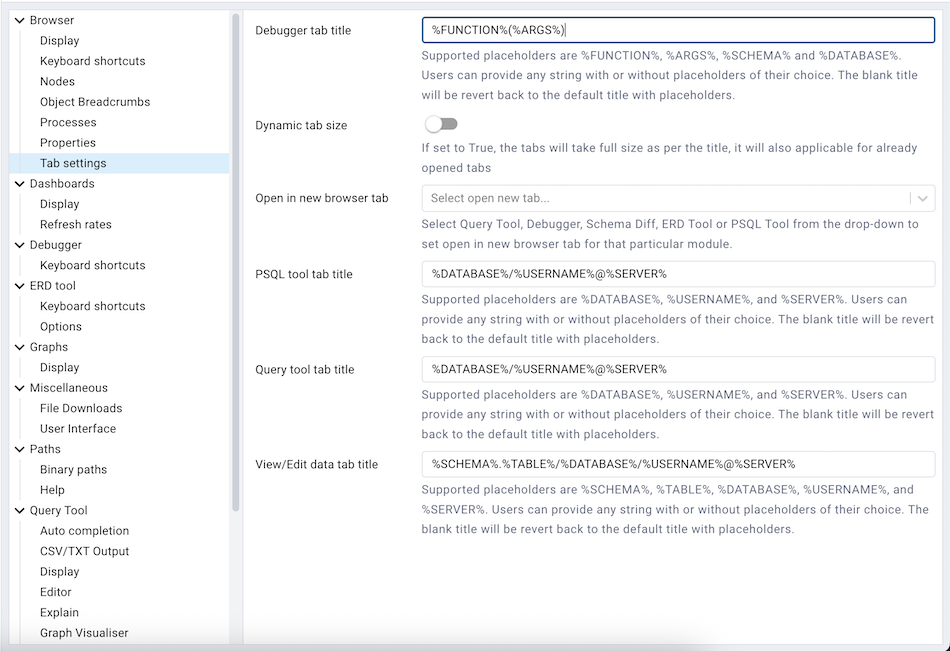
Use Debugger tab title placeholder field to customize the Debugger tab title.
When the Dynamic tab size switch is set to True, the tabs will take full size as per the title. This will also apply to already opened tabs.
Use the PSQL tool tab title placeholder field to customize the PSQL tool tab title.
When the Open in new browser tab field is selected for Query tool, Schema Diff or Debugger, it will open in a new browser tab when invoked.
Use the Query tool tab title placeholder field to customize the query tool tab title.
Use View/Edit tab title placeholder field to customize the View/Edit Data tab title.
The Dashboards Node
Expand the Dashboards node to specify your dashboard display preferences.
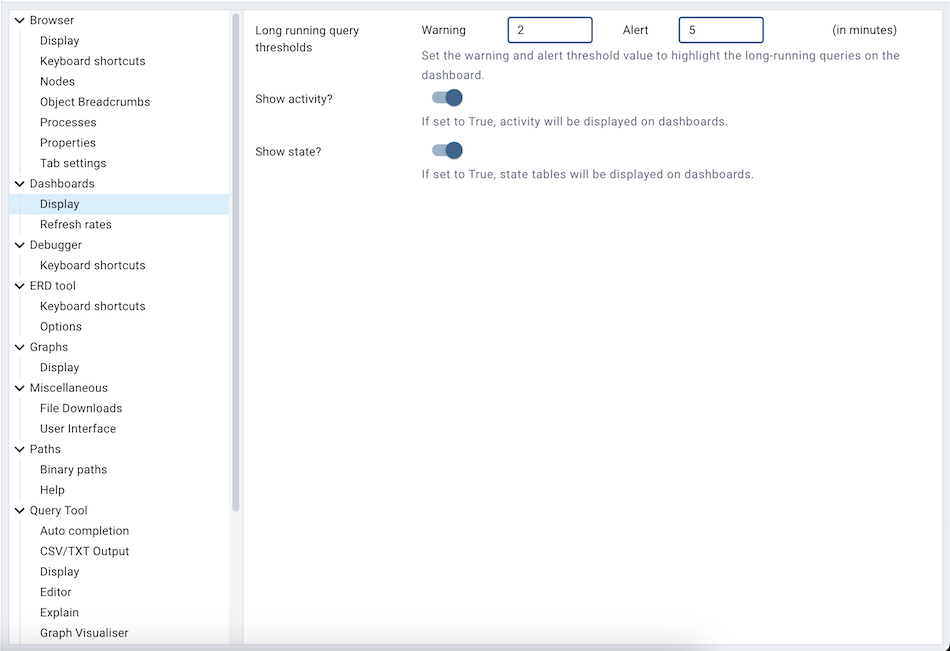
Set the warning and alert threshold value to highlight the long-running queries on the dashboard.
When the Show activity? switch is set to True, activity tables will be displayed on dashboards.
When the Show graphs? switch is set to True, graphs will be displayed on dashboards.
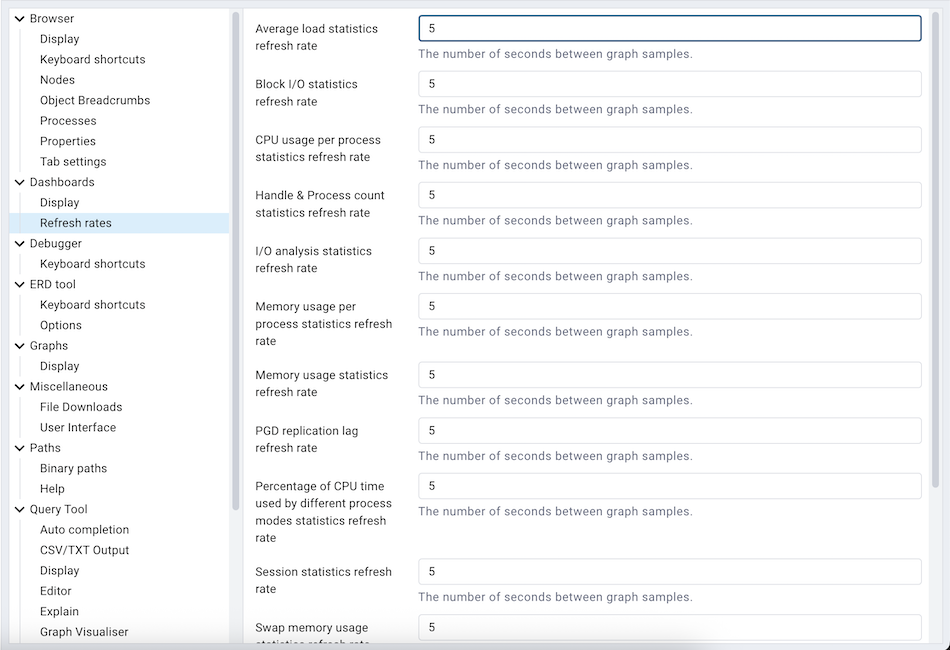
Use the fields on the Refresh rates panel to specify your refresh rate preferences for the graphs on the Dashboard tab:
Use the Average load statistics refresh rate field to specify the number of seconds between average load statistics samples displayed in graphs.
Use the Block I/O statistics refresh rate field to specify the number of seconds between block I/O statistic samples displayed in graphs.
Use the CPU usage per process statistics refresh rate field to specify the number of seconds between CPU usage per process statistics samples displayed in graphs.
Use the Handle & Process count statistics refresh rate field to specify the number of seconds between handle & process count statistics samples displayed in graphs.
Use the I/O analysis statistics refresh rate field to specify the number of seconds between I/O analysis statistics samples displayed in graphs.
Use the Memory usage per process statistics refresh rate field to specify the number of seconds between memory usage per process statistics samples displayed in graphs.
Use the Memory usage statistics refresh rate field to specify the number of seconds between memory usage statistics samples displayed in graphs.
Use the PGD replication lag refresh rate field to specify the number of seconds between PGD replication lag samples displayed in graphs.
Use the Percentage of CPU time used by different process modes statistics refresh rate field to specify the number of seconds between Percentage of CPU time used by different process modes samples displayed in graphs.
Use the Session statistics refresh rate field to specify the number of seconds between session statistic samples displayed in graphs.
Use the Swap memory usage statistics refresh rate field to specify the number of seconds between swap memory usage statistics samples displayed in graphs.
Use the Transaction throughput refresh rate field to specify the number of seconds between transaction throughput samples displayed in graphs.
Use the Tuples in refresh rate field to specify the number of seconds between tuples-in samples displayed in graphs.
Use the Tuples out refresh rate field to specify the number of seconds between tuples-out samples displayed in graphs.
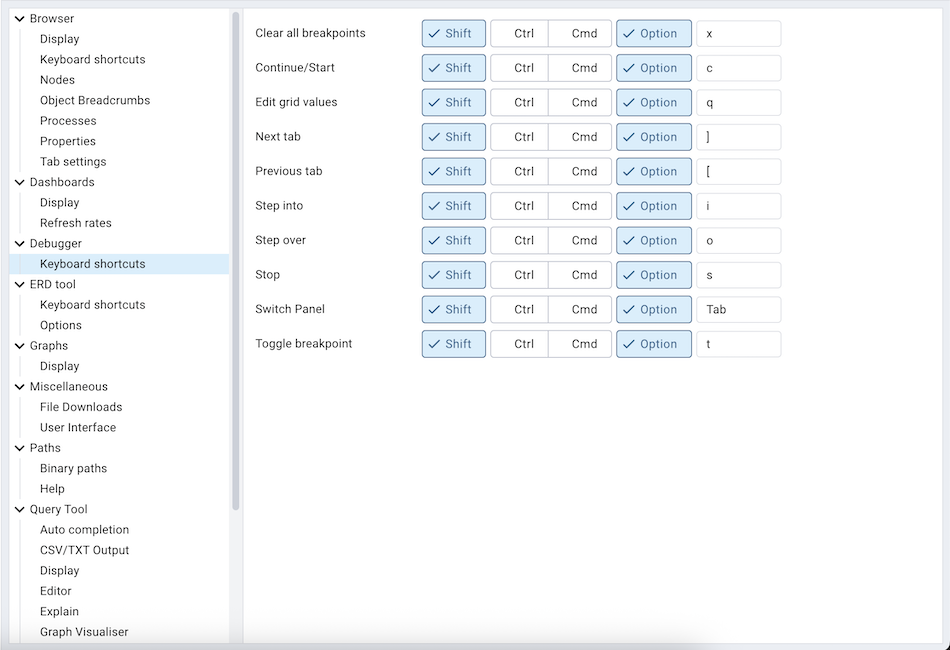
The Debugger Node
Expand the Debugger node to specify your debugger display preferences.
Use the fields on the Keyboard shortcuts panel to configure shortcuts for the debugger window navigation:
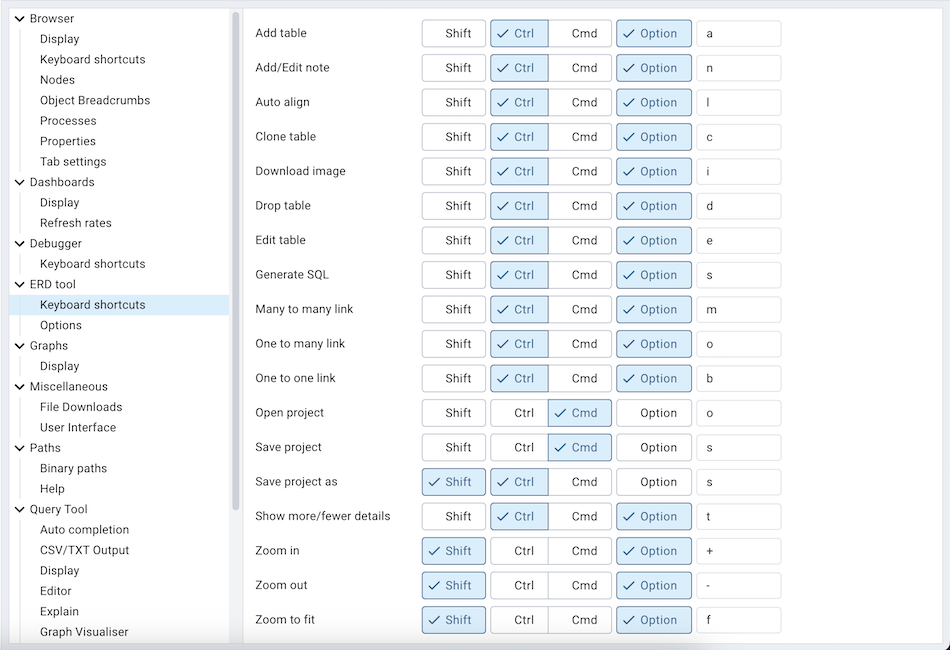
The ERD Tool Node
Expand the ERD Tool node to specify your ERD Tool display preferences.
Use the fields on the Keyboard shortcuts panel to configure shortcuts for the ERD Tool window navigation:
Use the fields on the Options panel to manage ERD preferences.

Use Cardinality Notation to change the cardinality notation format used to present relationship links.
Use Format ERD Project File? if you want to format the .pgerd ERD project file. It’s a JSON file which will be formatted.
Use Image Download Resolution to change the ERD image download resolution. Higher values will use higher memory and slower rendering.
When the SQL With DROP Table switch is set to True, the SQL generated by the ERD Tool will add DROP table DDL before each CREATE table DDL.
Table Relation Depth is useful when generating an ERD for a table. It allows to set the limit on the depth level pgAdmin should traverse to find the relations. Use -1 to set no limit.
The Editor Node
Expand the Editor node to access panels that allow you to specify your preferences for the editor across pgAdmin 4
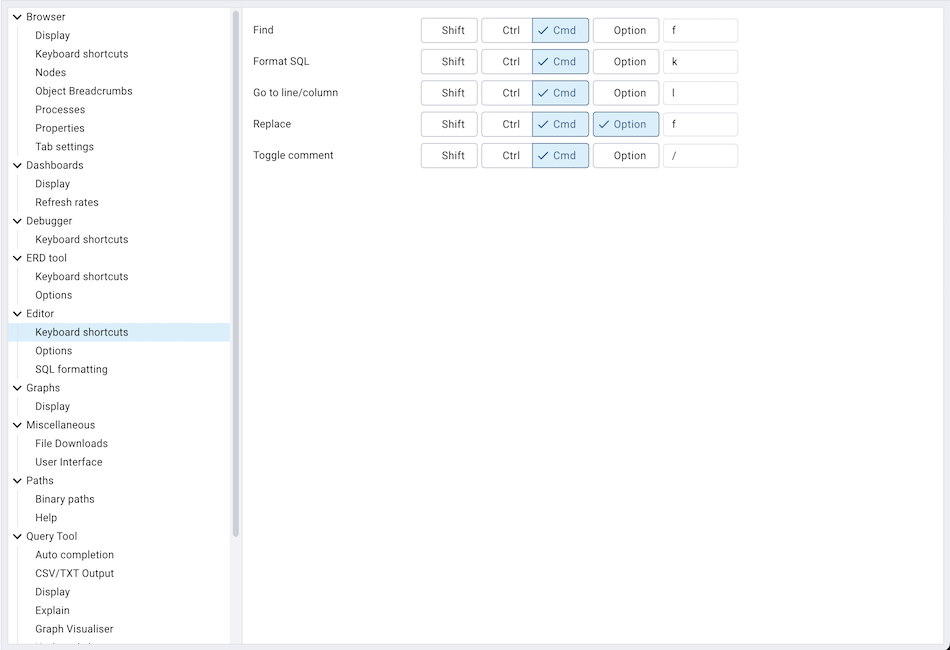
Use the fields on the Keyboard shortcuts panel to configure shortcuts for the editor.
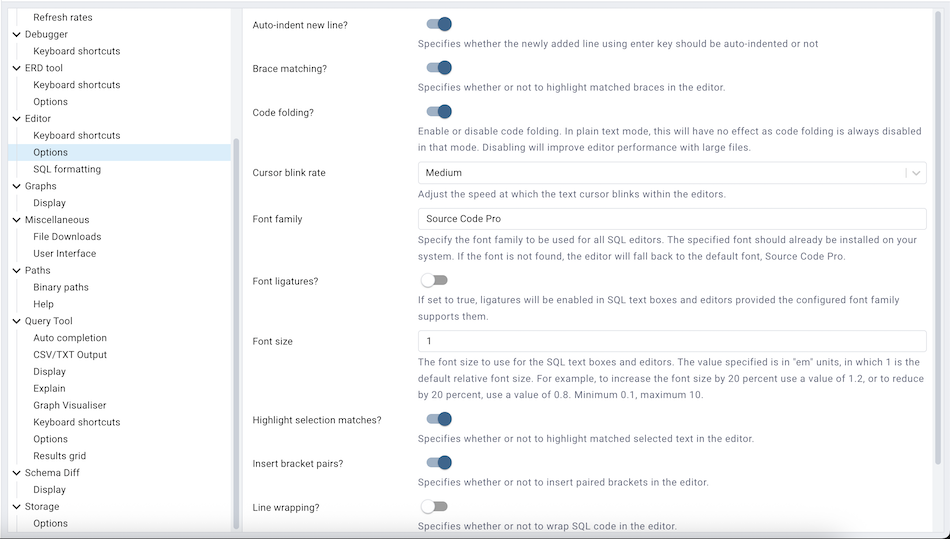
Use the fields on the Options panel to manage editor preferences.
Use the Auto-indent new line? switch to specify whether the editor will automatically indent new lines. When set to True, the editor will indent new lines according to the indentation of the previous line.
When the Brace matching? switch is set to True, the editor will highlight pairs of matched braces.
When the Code folding? switch is set to False, the editor will disable code folding. Disabling will improve editor performance with large files.
Use the Cursor blink rate field to adjust the speed at which the text cursor blinks within the editors.
Use the Font family field to be used for all SQL editors. The specified font should already be installed on your system. If the font is not found, the editor will fall back to the default font, Source Code Pro.
When the Font ligatures? switch is set to True, ligatures will be enabled in SQL text boxes and editors provided the configured font family supports them.
Use the Font size field to specify the font size that will be used in text boxes and editors.
When the Highlight selection matches? switch is set to True, the editor will highlight matched selected text.
When the Insert bracket pairs? switch is set to True, the editor will automatically insert paired brackets.
When the Line wrapping switch is set to True, the editor will implement line-wrapping behavior.
When the Plain text mode? switch is set to True, the editor mode will be changed to text/plain. Keyword highlighting and code folding will be disabled. This will improve editor performance with large files.

Use the fields on the SQL formatting panel to specify your preferences for reformatting of SQL.
Use the Data type case option to specify whether to change data types into upper, lower, or preserve case.
Use the Expression width option to specify maximum number of characters in parenthesized expressions to be kept on single line.
Use the Function case option to specify whether to change function names into upper, lower, or preserve case.
Use the Identifier case option to specify whether to change identifiers (object names) into upper, lower, or capitalized case.
Use the Keyword case option to specify whether to change keywords into upper, lower, or preserve case.
Use Lines between queries to specify how many empty lines to leave between SQL statements. If set to zero it puts no new line.
Use Logical operator new line to specify newline placement before or after logical operators (AND, OR, XOR).
Use New line before semicolon? to specify whether to place query separator (;) on a separate line.
Use the Spaces around operators? option to specify whether or not to include spaces on either side of operators.
Use the Tab size option to specify the number of spaces per tab or indent.
Use the Use spaces? option to select whether to use spaces or tabs when indenting.
The Graphs Node
Expand the Graphs node to specify your Graphs display preferences.
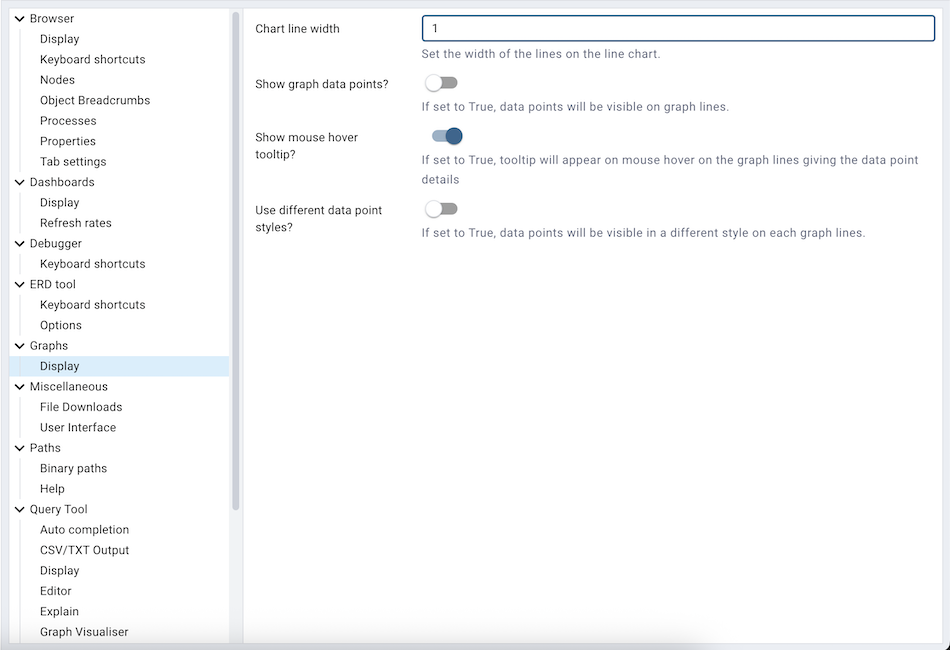
Use the Chart line width field to specify the width of the lines on the line chart.
When the Show graph data points? switch is set to True, data points will be visible on graph lines.
When the Show mouse hover tooltip? switch is set to True, a tooltip will appear on mouse hover on the graph lines giving the data point details.
When the Use different data point styles? switch is set to True, data points will be visible in a different style on each graph lines.
The Miscellaneous Node
Expand the Miscellaneous node to specify miscellaneous display preferences.
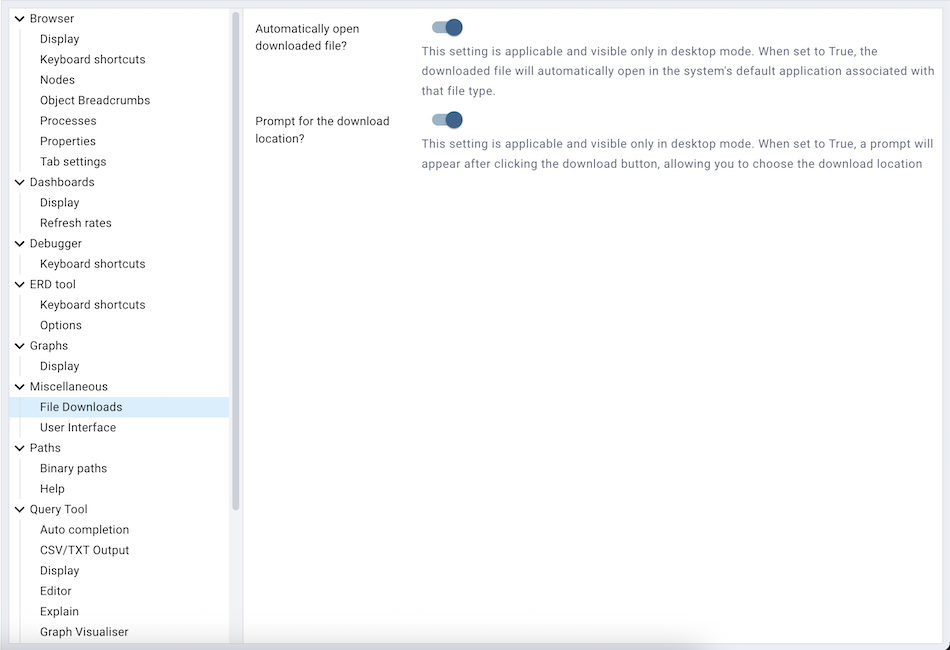
Use the fields on the File Downloads panel to manage file downloads related preferences.
When the Automatically open downloaded files? switch is set to True the downloaded file will automatically open in the system’s default application associated with that file type. Note: This option is applicable and visible only in desktop mode.
When the Enable binary data download? switch is set to True, binary data can be downloaded from the result grid. Default is set to False to prevent excessive memory usage on the server.
When the Prompt for the download location? switch is set to True a prompt will appear after clicking the download button, allowing you to choose the download location. Note: This option is applicable and visible only in desktop mode.
Note: File Downloads related settings are applicable and visible only in desktop mode.
Use the fields on the User Interface panel to set the user interface related preferences.
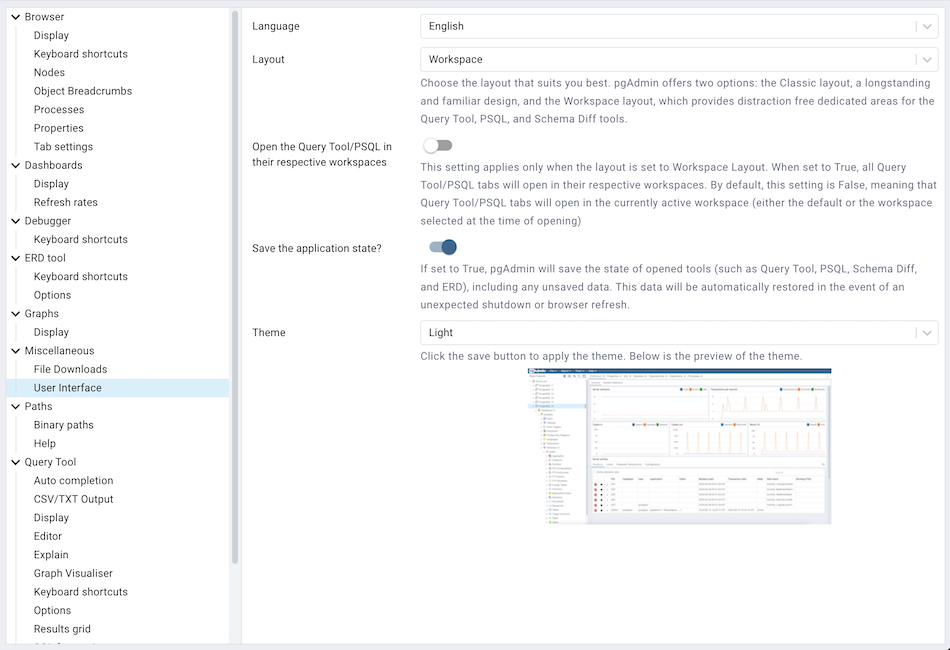
Use the Language drop-down listbox to select the display language for the client.
Use the Layout drop-down listbox to select the layout for the client. pgAdmin offers two options: the Classic layout, a longstanding and familiar design, and the Workspace layout, which provides distraction free dedicated areas for the Query Tool, PSQL, and Schema Diff tools. ‘Workspace’ layout is the default layout, but user can change it to ‘Classic’.
When the Open the Query Tool/PSQL in their respective workspaces switch is set to True then all Query Tool/PSQL tabs will open in their respective workspaces. By default, this setting is False, meaning that Query Tool/PSQL tabs will open in the currently active workspace (either the default or the workspace selected at the time of opening).
When the Save the application state? option is enabled the current state of various tools—such as Query Tool, ERD, Schema Diff, and PSQL—will be saved in the encrypted format. If the application is closed unexpectedly, the tab is accidentally closed, or the page is refreshed, the saved state will be automatically restored for each respective tool. Note: Saving the application state will not preserve data for tool tabs opened in separate browser tabs when running in server mode.Any tool referring ad-hoc server connection will not be restored.
Use the Themes drop-down listbox to select the theme for pgAdmin. You’ll also get a preview just below the drop down. You can also submit your own themes, check here how. Currently we support Light, Dark, High Contrast and System theme. Selecting System option will follow your computer’s settings.
The Paths Node
Expand the Paths node to specify the locations of supporting utility and help files.
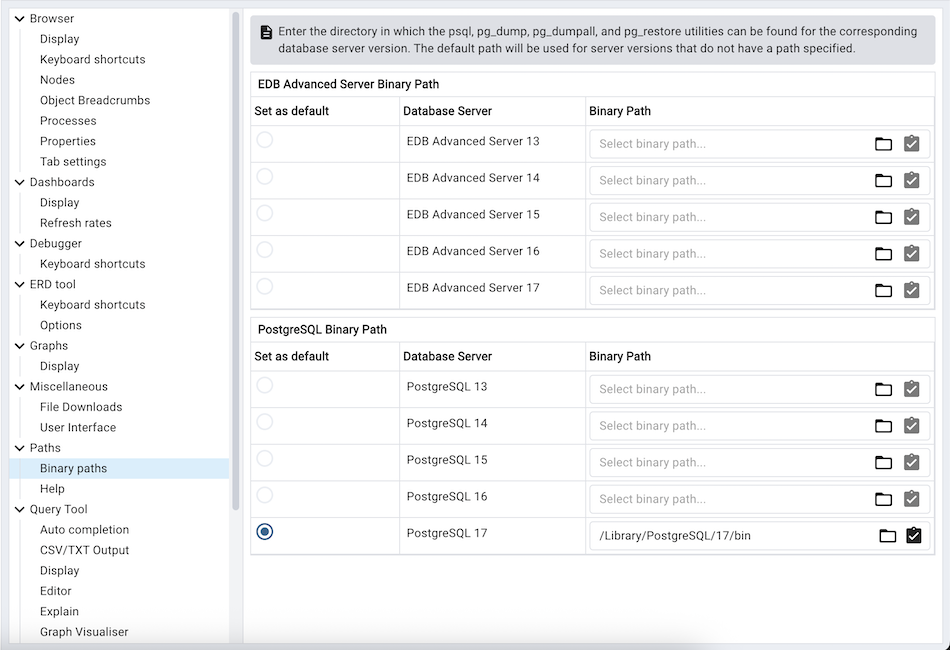
Use the fields on the Binary paths panel to specify the path to the directory that contains the utility programs (pg_dump, pg_dumpall, pg_restore and psql) for monitored databases:
Use the EDB Advanced Server Binary Path grid to specify the location of the EDB Postgres Advanced Server utility programs based on the server version. If the respective path is not set, then pgAdmin will pick up the path for which ‘Set as default’ is checked else pgAdmin will attempt to find the utilities in standard locations used by EnterpriseDB.
Use the PostgreSQL Binary Path grid to specify the location of the PostgreSQL utility programs based on the server version. If the respective path is not set, then pgAdmin will pick up the path for which ‘Set as default’ is checked else pgAdmin will attempt to find the utilities in standard locations used by PostgreSQL.
Note: Use the ‘Validate path’ button to check the existence of the utility programs (pg_dump, pg_dumpall, pg_restore and psql) and their respective versions.
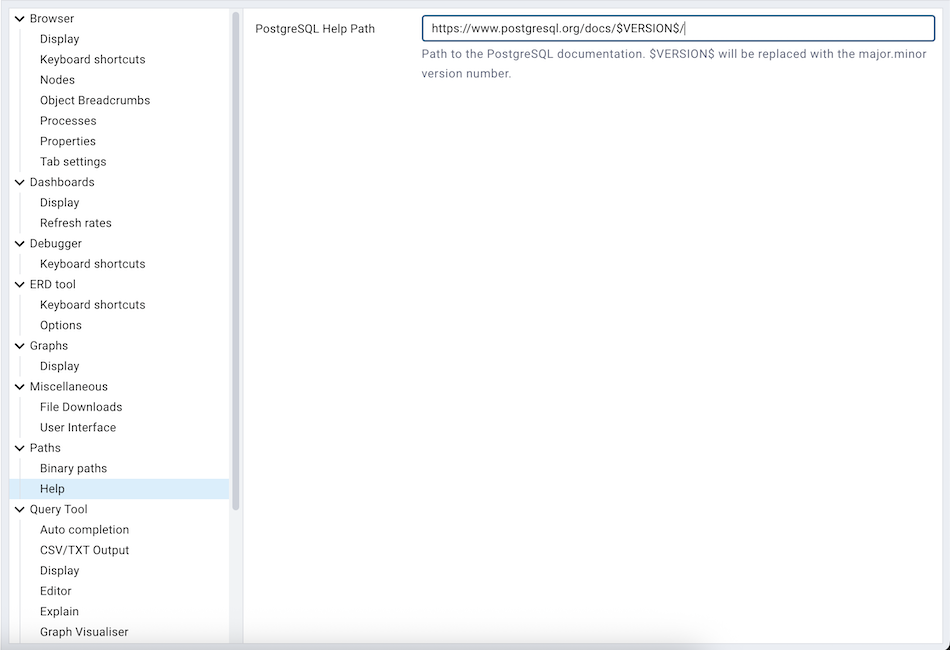
Use the fields on the Help panel to specify the location of help files.
Use the PostgreSQL Help Path to specify the path to PostgreSQL documentation.
Please note: the default help paths include the VERSION placeholder; the $VERSION$ placeholder will be replaced by the current database version.
The Query Tool Node
Expand the Query Tool node to access panels that allow you to specify your preferences for the Query Editor tool.
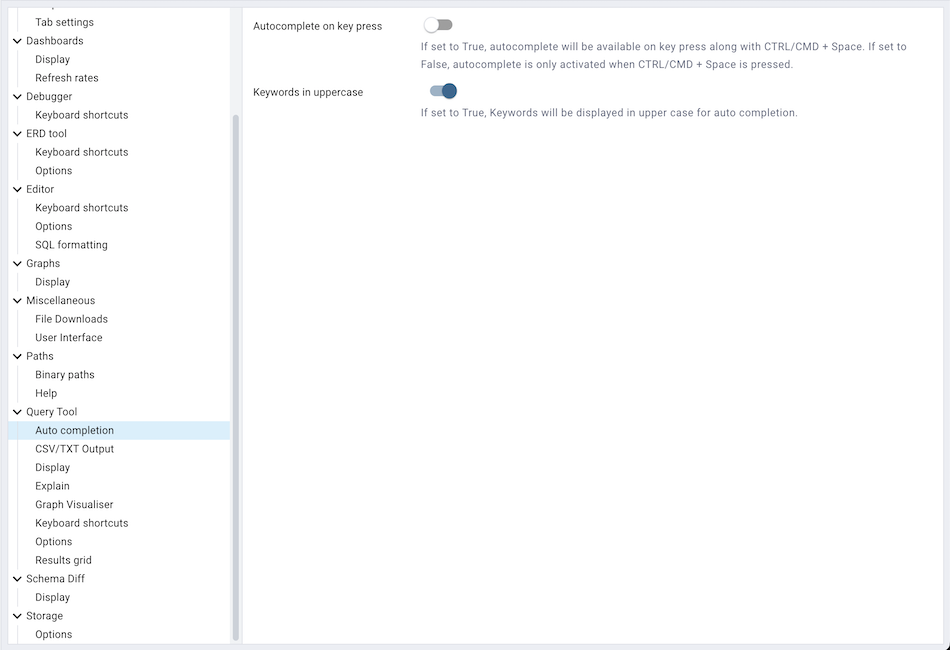
Use the fields on the Auto Completion panel to set the auto completion options.
When the Autocomplete on key press switch is set to True then autocomplete will be available on key press along with CTRL/CMD + Space. If it is set to False then autocomplete is only activated when CTRL/CMD + Space is pressed.
When the Keywords in uppercase switch is set to True then keywords are shown in upper case.
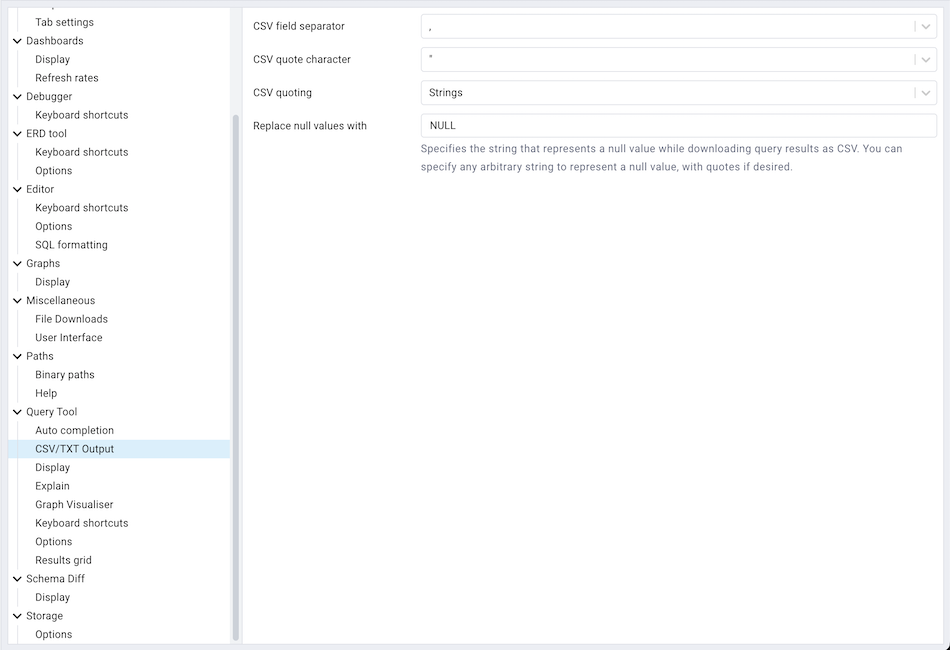
Use the fields on the CSV/TXT Output panel to control the CSV/TXT output.
Use the CSV field separator drop-down listbox to specify the separator character that will be used in CSV/TXT output.
Use the CSV quote character drop-down listbox to specify the quote character that will be used in CSV/TXT output.
Use the CSV quoting drop-down listbox to select the fields that will be quoted in the CSV/TXT output; select Strings, All, or None.
Use the Replace null values with option to replace null values with specified string in the output file. Default is set to ‘NULL’.
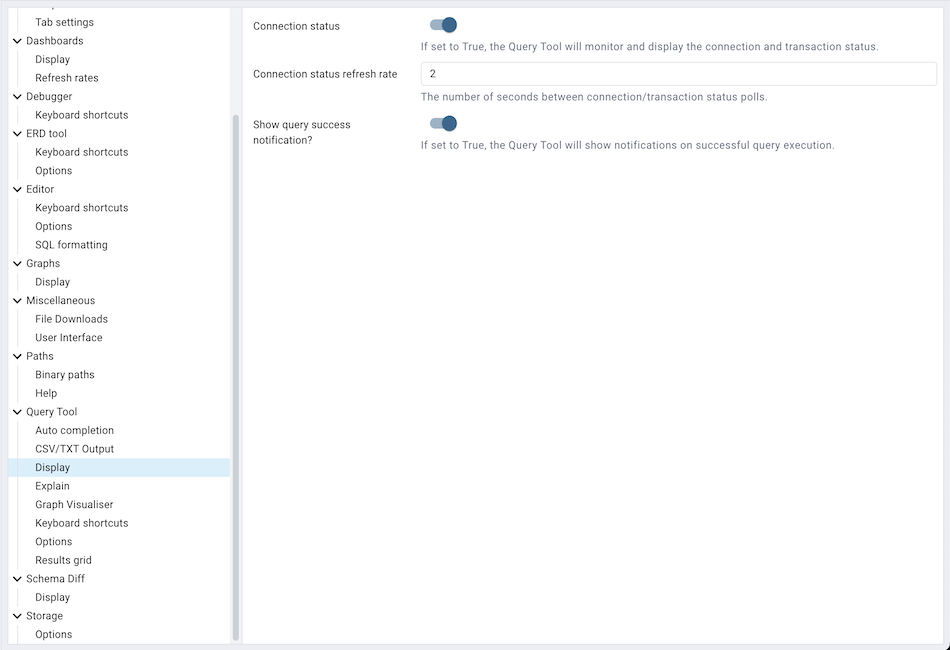
Use the fields on the Display panel to specify your preferences for the Query Tool display.
When the Connection status switch is set to True, each new instance of the Query Tool will display connection and transaction status.
Use the Connection status refresh rate field to specify the number of seconds between connection/transaction status updates.
When the Show query success notification? switch is set to True, the Query Tool will show notifications on successful query execution.
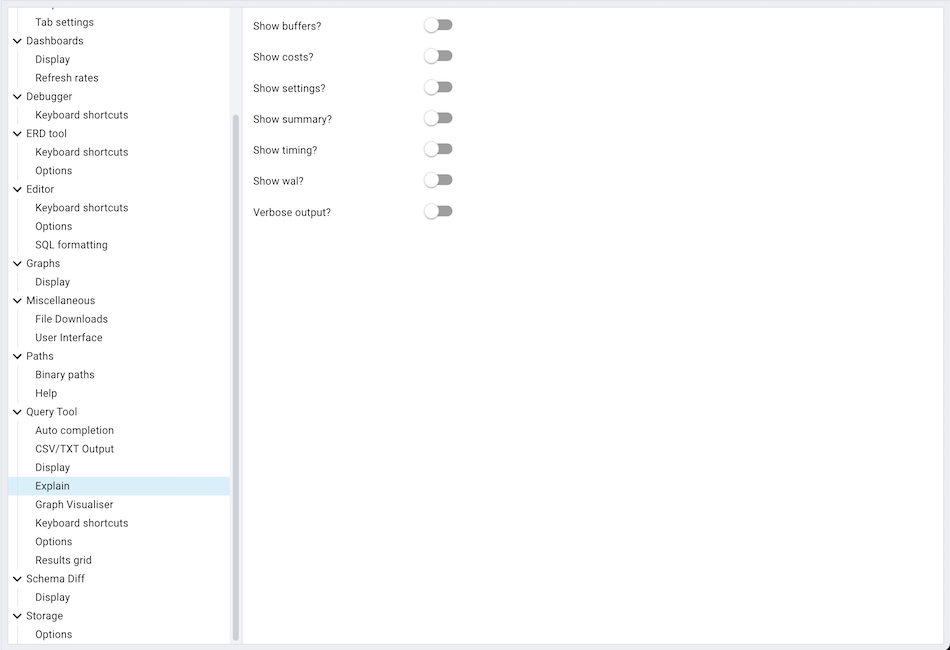
Use the fields on the Explain panel to specify the level of detail included in a graphical EXPLAIN.
When the Show buffers? switch is set to True, graphical explain details will include information about buffer usage.
When the Show costs? switch is set to True, graphical explain details will include information about the estimated startup and total cost of each plan, as well as the estimated number of rows and the estimated width of each row.
When the Show settings? switch is set to True, graphical explain details will include the information on the configuration parameters.
When the Show summary? switch is set to True, graphical explain details will include the summary information about the query plan.
When the Show timing? switch is set to True, graphical explain details will include the startup time and time spent in each node in the output.
When the Show wal? switch is set to True, graphical explain details will include the information on WAL record generation.
When the Verbose output? switch is set to True, graphical explain details will include extended information about the query execution plan.
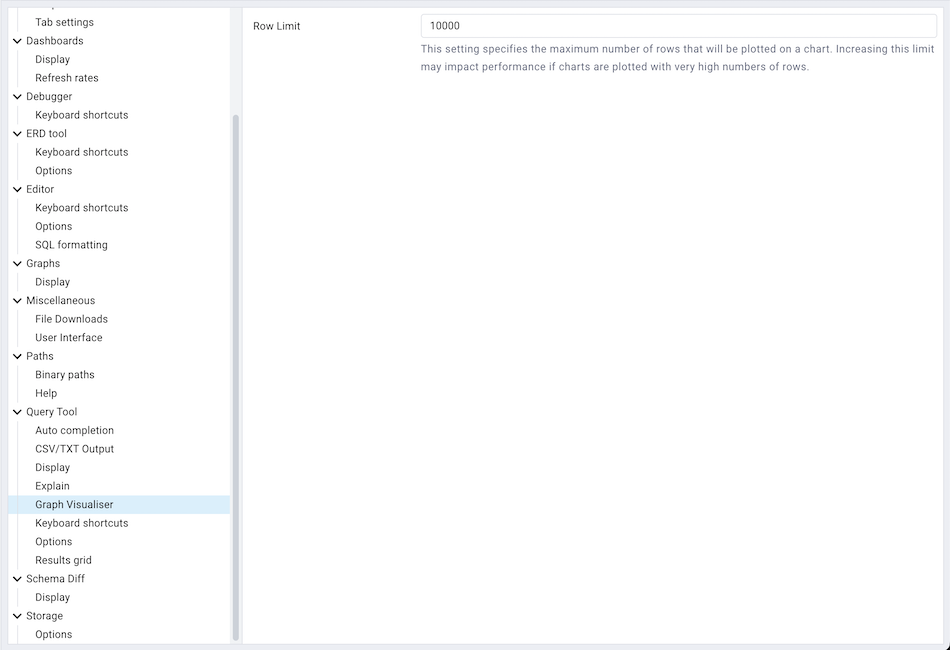
Use the fields on the Graph Visualiser panel to specify the settings related to graphs.
Use the Row Limit field to specify the maximum number of rows that will be plotted on a chart.
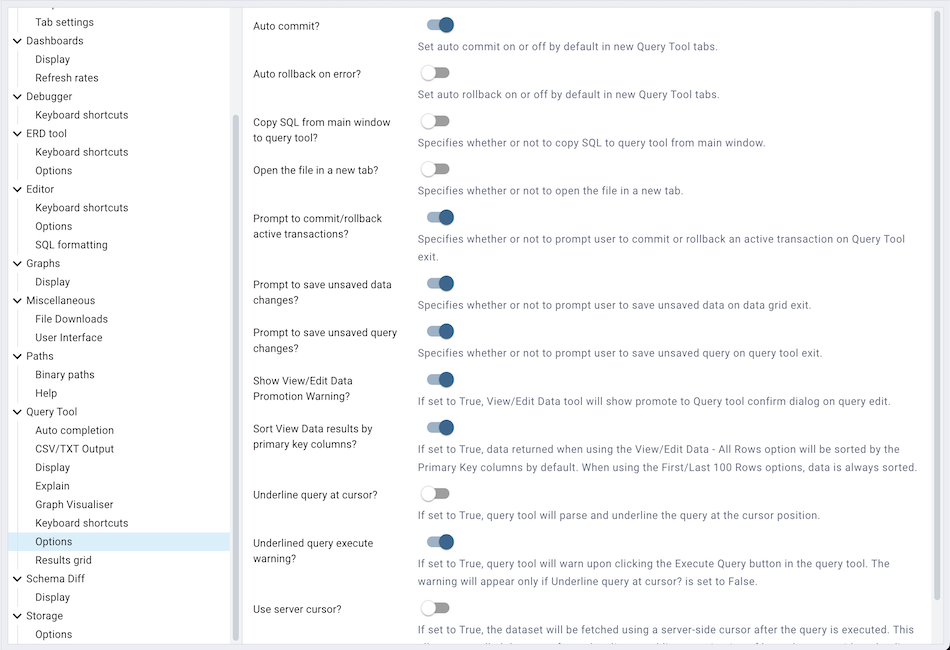
Use the fields on the Options panel to manage editor preferences.
When the Auto commit? switch is set to True, each successful query is committed after execution.
When the Auto rollback on error? switch is set to True, failed queries are rolled back.
When the Copy SQL from main window to query tool? switch is set to True, the CREATE sql of the selected object will be copied to query tool when query tool will open.
When the Open the file in a new tab? switch is set to True, the editor will open the new file in new tab of the Query Tool.
When the Prompt to commit/rollback active transactions? switch is set to True, the editor will prompt the user to commit or rollback changes when exiting the Query Tool while the current transaction is not committed.
When the Prompt to save unsaved data changes? switch is set to True, the editor will prompt the user to saved unsaved data when exiting the data editor.
When the Prompt to save unsaved query changes? switch is set to True, the editor will prompt the user to saved unsaved query modifications when exiting the Query Tool.
When the Show View/Edit Data Promotion Warning? switch is set to True View/Edit Data tool will show promote to Query tool confirm dialog on query edit.
When the Sort View Data results by primary key columns? If set to True, data returned when using the View/Edit Data - All Rows option will be sorted by the Primary Key columns by default. When using the First/Last 100 Rows options, data is always sorted.
When the Underline query at cursor? switch is set to True, query tool will parse and underline the query at the cursor position.
When the Underlined query execute warning? switch is set to True, query tool will warn upon clicking the Execute Query button in the query tool. The warning will appear only if Underline query at cursor? is set to False.
When the Use server cursor? switch is set to True, the dataset will be fetched using a server-side cursor after the query is executed.
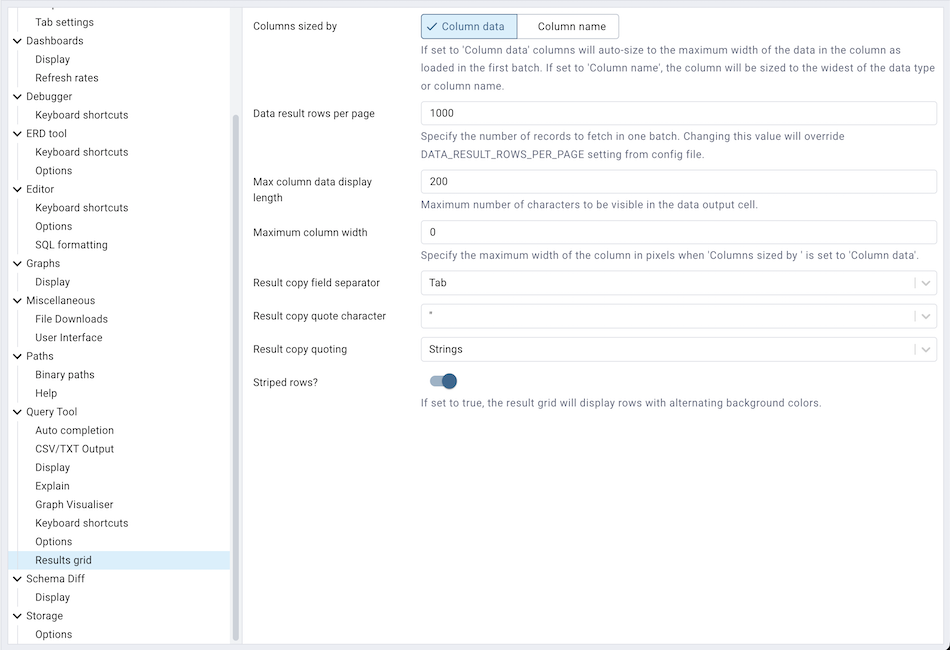
Use the fields on the Results grid panel to specify your formatting preferences for copied data.
When the Columns sized by is set to Column data, then data columns will auto-size to the maximum width of the data in the column as loaded in the first batch. If set to Column name, the column will be sized to the widest of the data type or column name.
Use Data result rows per page to specify the number of records to fetch in one batch. Changing this value will override DATA_RESULT_ROWS_PER_PAGE setting from config file.
Use the Max column data display length to specify the maximum number of characters to be visible in the data output cell. If the data is larger than this value, it will be truncated.
Use Maximum column width to Specify the maximum width of the column in pixels when ‘Columns sized by’ is set to Column data. If ‘Columns sized by’ is set to Column name then this setting won’t have any effect.
Use the Result copy field separator drop-down listbox to select the field separator for copied data.
Use the Result copy quote character drop-down listbox to select the quote character for copied data.
Use the Result copy quoting drop-down listbox to select which type of fields require quoting; select All, None, or Strings.
When the Striped rows? switch is set to true, the result grid will display rows with alternating background colors.
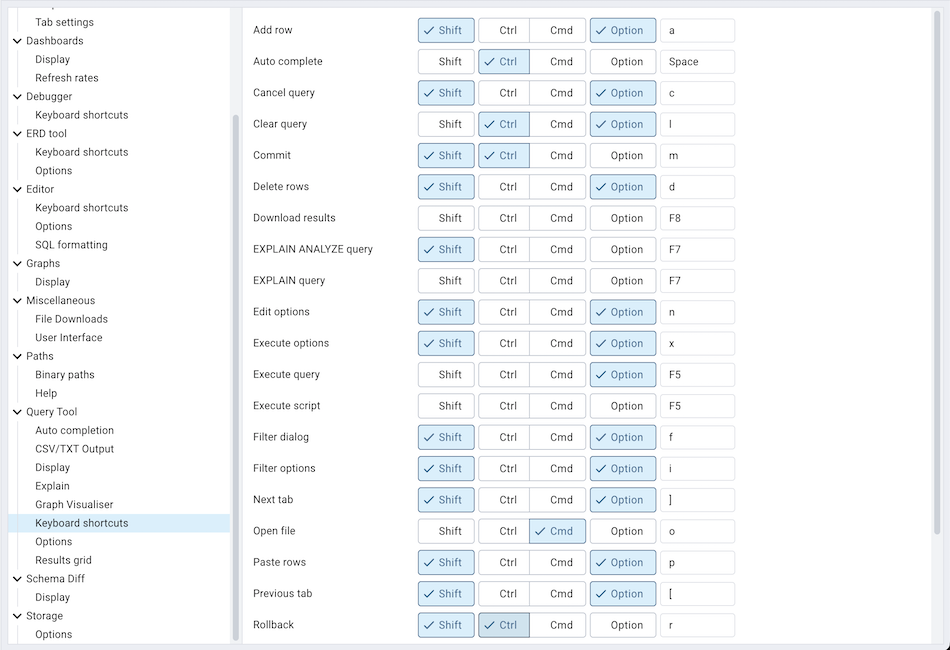
Use the fields on the Keyboard shortcuts panel to configure shortcuts for the Query Tool window navigation.
The Schema Diff Node
Expand the Schema Diff node to specify your display preferences.
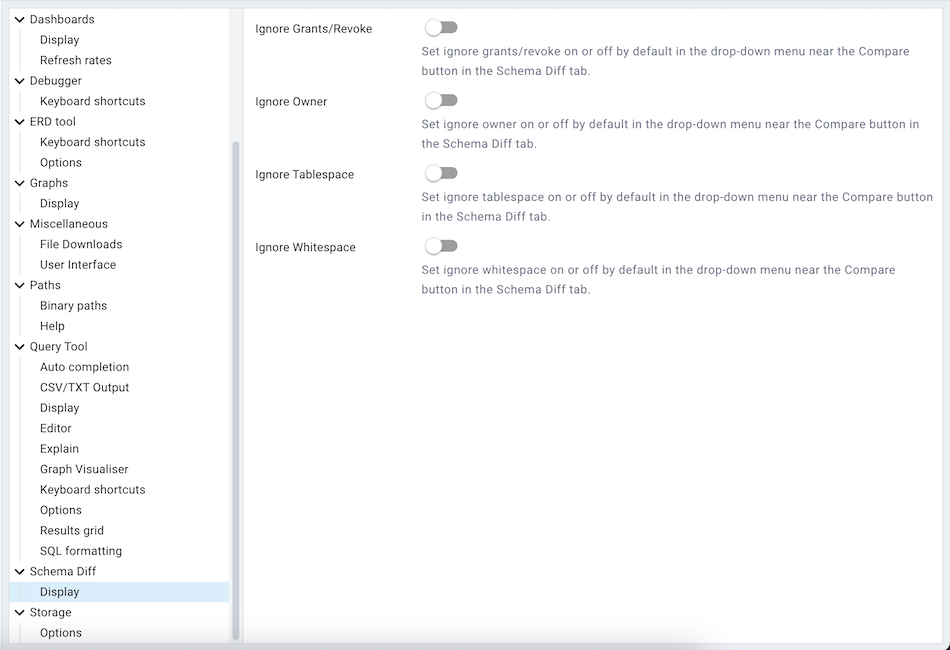
Use the Ignore Grant/Revoke switch to ignores the grant and revoke command while comparing the objects.
Use the Ignore Owner switch to ignores the owner while comparing the objects.
Use the Ignore Tablespace switch to ignores the tablespace while comparing the objects.
Use the Ignore Whitespace switch to ignores the whitespace while comparing the string objects. Whitespace includes space, tabs, and CRLF.
The Storage Node
Expand the Storage node to specify your storage preferences.
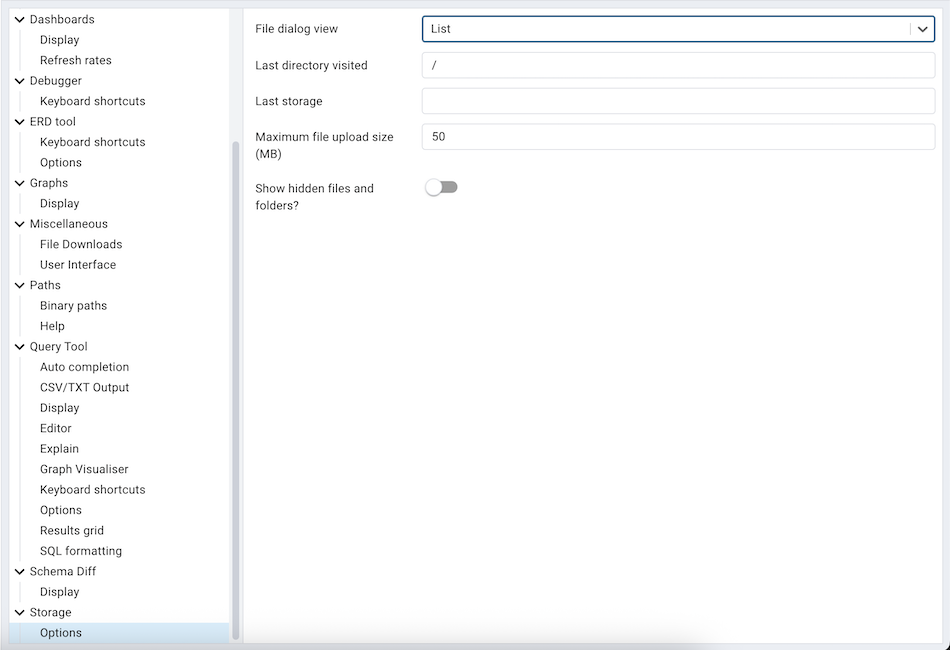
Use the fields on the Options panel to specify storage preferences.
Use the File dialog view drop-down listbox to select the style of icons and display format that will be displayed when you open the file manager; select List to display a list view, or Grid to display folder icons.
Use the Last directory visited field to specify the name of the folder in which the file manager will open.
Use the Maximum file upload size(MB) field on the Options panel of the Storage node to specify the maximum file size for an upload.
When the Show hidden files and folders? switch is set to True, the file manager will display hidden files and folders.
Using ‘setup.py’ command line script
Note
To manage preferences using setup.py script, you must use
the Python interpreter that is normally used to run pgAdmin to ensure
that the required Python packages are available. In most packages, this
can be found in the Python Virtual Environment that can be found in the
installation directory. When using platform-native packages, the system
installation of Python may be the one used by pgAdmin.
Manage Preferences
Get Preferences
To get all the preferences listed, invoke setup.py with get-prefs command line option.
You can also get this mapping by hovering the individual preference in the Preference UI dialog.
/path/to/python /path/to/setup.py get-prefs
Save Preferences
To save the preferences, invoke setup.py with set-prefs command line option, followed by username,
preference_key=value and auth_source. Multiple preference can be given too by a space separated.
If auth_source is not given, Internal authentication will be consider by default.
/path/to/python /path/to/setup.py set-prefs user1@gmail.com sqleditor:editor:comma_first=true

# To specify multiple preferences options
/path/to/python /path/to/setup.py set-prefs user1@gmail.com sqleditor:editor:comma_first=true sqleditor:keyboard_shortcuts:toggle_case=true

# to specify an auth_source
/path/to/python /path/to/setup.py set-prefs user1@gmail.com sqleditor:editor:comma_first=true --auth-source=ldap
Updating Preferences preferences.json
To update preferences defined in json file, simply run setup.py `` with ``set-prefs command followed by username
and JSON file containing the preferences.
/path/to/python /path/to/setup.py set-prefs user1@gmail.com --input-file /Users/yogeshmahajan/Desktop/pref.json
JSON format
The JSON file simply contains preference_key=value. Preference key value mapping can be obtained by hovering the individual preference in the Preference UI dialog.
The following is an typical example for preferences.json :
{
    "preferences":
        {
            "browser:display:show_system_objects":  true,
            "browser:display:show_user_defined_templates": true,
            "browser:display:confirm_on_refresh_close": false,
            "misc:user_interface:theme": "dark",

        }
}