Backup Dialog
pgAdmin uses the pg_dump utility to provide an easy way to create a backup in a plain-text or archived format. You can then use a client application (like psql or the Query Tool) to restore a plain-text backup file, or use the Postgres pg_restore utility to restore an archived backup. The pg_dump utility must have read access to all database objects that you want to back up.
You can backup a single table, a schema, or a complete database. Select the name of the backup source in the pgAdmin tree control, right click to open the context menu, and select Backup… to open the Backup dialog. The name of the object selected will appear in the dialog title bar.
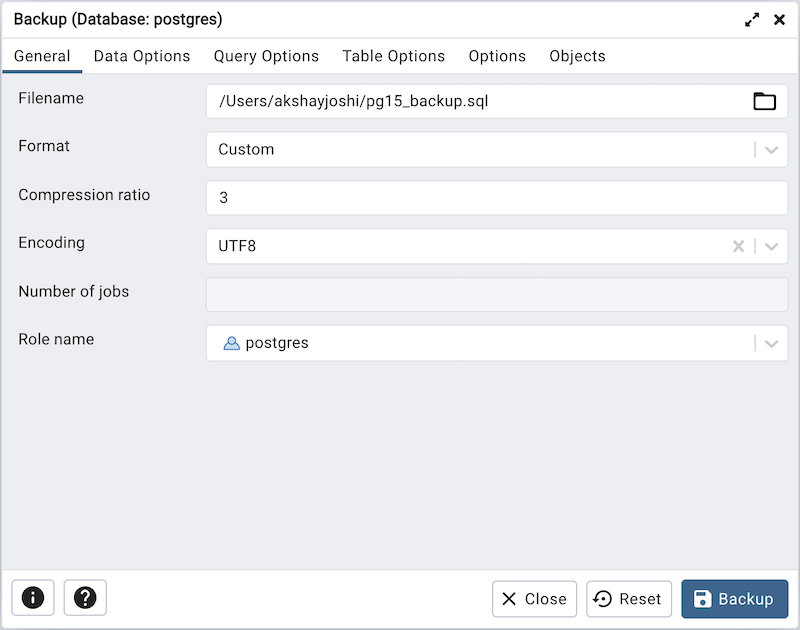
Use the fields in the General tab to specify parameters for the backup:
Enter the name of the backup file in the Filename field. Optionally, select the Browser icon (…) to the right to navigate into a directory and select a file that will contain the archive.
Use the drop-down listbox in the Format field to select the format that is best suited for your application. Each format has advantages and disadvantages:
Select Custom to create a custom archive file that you can use with pg_restore to create a copy of a database. Custom archive file formats must be restored with pg_restore. This format offers the opportunity to select which database objects to restore from the backup file. Custom archive format is recommended for medium to large databases as it is compressed by default.
Select Tar to generate a tar archive file that you can restore with pg_restore. The tar format does not support compression.
Select Plain to create a plain-text script file. A plain-text script file contains SQL statements and commands that you can execute at the psql command line to recreate the database objects and load the table data. A plain-text backup file can be edited in a text editor, if desired, before using the psql program to restore database objects. Plain format is normally recommended for smaller databases; script dumps are not recommended for blobs. The SQL commands within the script will reconstruct the database to the last saved state of the database. A plain-text script can be used to reconstruct the database on another machine, or (with modifications) on other architectures.
Select Directory to generate a directory-format archive suitable for use with pg_restore. This file format creates a directory with one file for each table and blob being dumped, plus a Table of Contents file describing the dumped objects in a machine-readable format that pg_restore can read. This format is compressed by default.
Use the Compression Ratio field to select a compression level for the backup. Specify a value of zero to mean use no compression; specify a maximum compression value of 9. Please note that tar archives do not support compression.
Use the Encoding drop-down listbox to select the character encoding method that should be used for the archive.
Use the Number of Jobs field (when applicable) to specify the number of tables that will be dumped simultaneously in a parallel backup.
Use the dropdown listbox next to Rolename to specify the role that owns the backup.
Click the Data Options tab to continue. Use the fields in the Data Options tab to provide options related to data or pgAdmin objects that correspond to pg_dump.
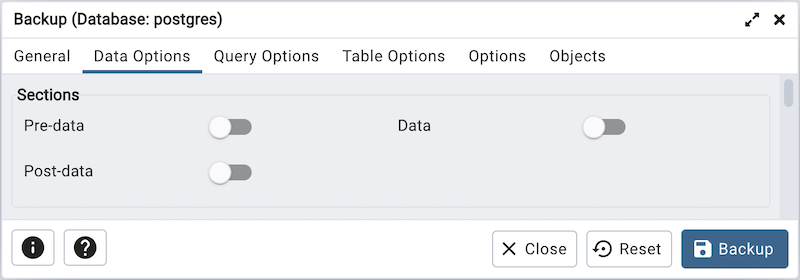
Move switches in the Sections field box to select a portion of the object that will be backed up.
Move the switch next to Pre-data to the Yes position to include all data definition items not included in the data or post-data item lists.
Move the switch next to Data to the Yes position to backup actual table data, large-object contents, and sequence values.
Move the switch next to Post-data to the Yes position to include definitions of indexes, triggers, rules, and constraints other than validated check constraints.
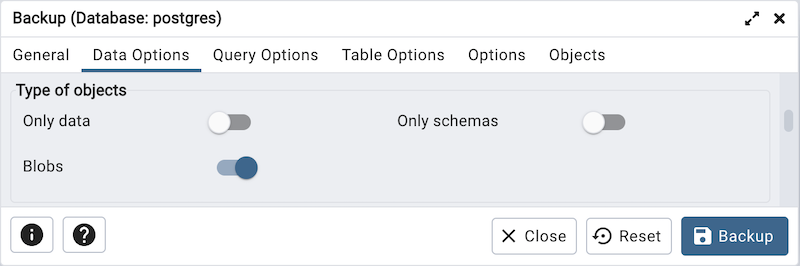
Move switches in the Type of objects field box to specify details about the type of objects that will be backed up.
Move the switch next to Only data to the Yes position to limit the back up to data.
Move the switch next to Only schemas to limit the back up to schema-level database objects.
Move the switch next to Blobs to the No position to exclude large objects in the backup.
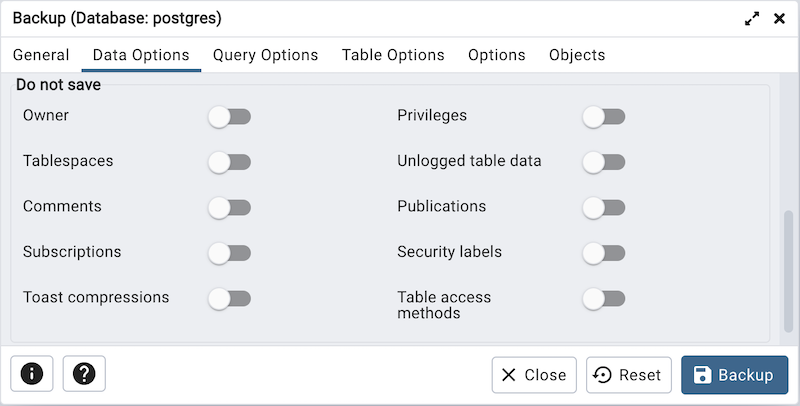
Move switches in the Do not save field box to select the objects that will not be included in the backup.
Move the switch next to Owner to the Yes position to exclude commands that set object ownership.
Move the switch next to Privileges to the Yes position to exclude commands that create access privileges.
Move the switch next to Tablespaces to the Yes position to exclude tablespaces.
Move the switch next to Unlogged table data to the Yes position to exclude the contents of unlogged tables.
Move the switch next to Comments to the Yes position to exclude commands that set the comments. Note: This option is visible only for database server greater than or equal to 11.
Move the switch next to Publications to the Yes position to exclude publications.
Move the switch next to Subscriptions to the Yes position to exclude subscriptions.
Move the switch next to Security labels to the Yes position to exclude Security labels.
Move the switch next to Toast compressions to the Yes position to exclude Toast compressions. Note: This option is visible only for database server greater than or equal to 14.
Move the switch next to Table access methods to the Yes position to exclude Table access methods. Note: This option is visible only for database server greater than or equal to 15.
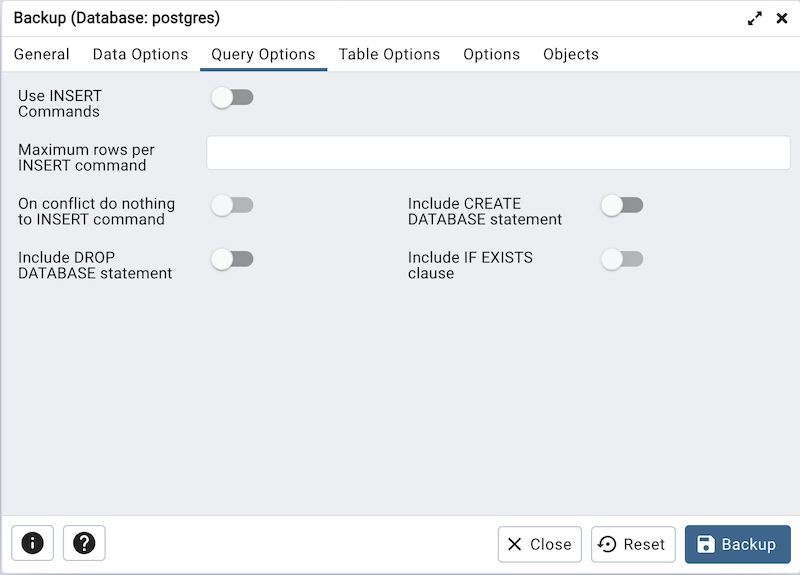
Click the Query Options tab to continue. Use these additional fields to specify the type of statements that should be included in the backup.
Move the switch next to Use INSERT commands to the Yes position to dump the data in the form of INSERT statements rather than using a COPY command. Please note: this may make restoration from backup slow.
Use the Maximum rows per INSERT command field to controls the maximum number of rows per INSERT command. Note: This option is visible only for database server greater than or equal to 12.
Move the switch next to On conflict do nothing to INSERT command towards right position to add ON CONFLICT DO NOTHING to INSERT command. This option is not valid unless Use INSERT commands, Use Column INSERTS or Maximum rows per INSERT command is also specified. Note: This option is visible only for database server greater than or equal to 12.
Move the switch next to Include CREATE DATABASE statement to the Yes position to include a command in the backup that creates a new database when restoring the backup.
Move the switch next to Include DROP DATABASE statement to the Yes position to include a command in the backup that will drop any existing database object with the same name before recreating the object during a backup.
Move the switch next to Include IF EXISTS clause to the Yes position to add an IF EXISTS clause to drop databases and other objects. This option is not valid unless Include DROP DATABASE statement is also set.
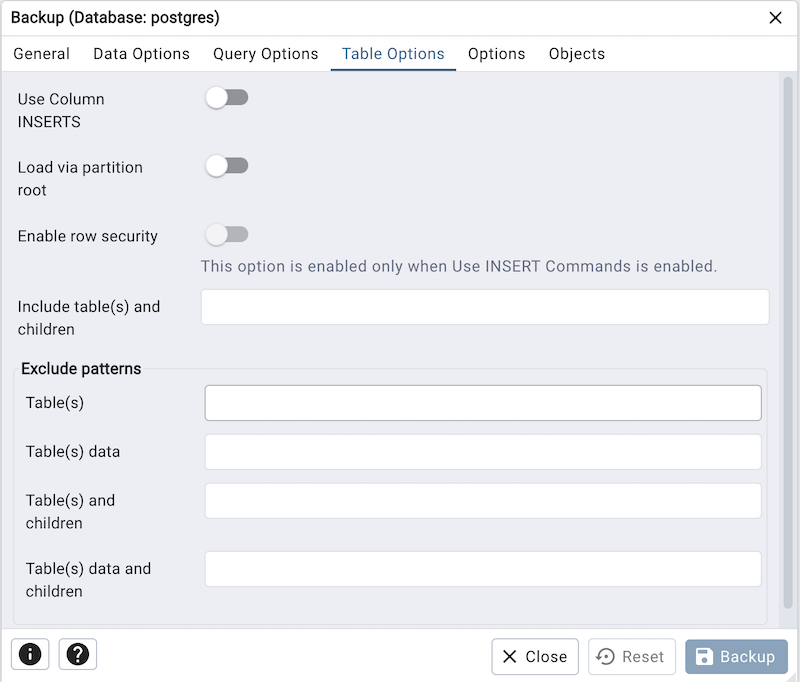
Click the Table Options tab to continue. Use the fields in the Table Options tab related to tables that should be included in the backup.
Move the switch next to Use Column INSERTS to the Yes position to dump the data in the form of INSERT statements and include explicit column names. Please note: this may make restoration from backup slow.
Move the switch next to Load via partition root to the Yes position, so when dumping a COPY or INSERT statement for a partitioned table, target the root of the partitioning hierarchy which contains it rather than the partition itself. Note: This option is visible only for database server greater than or equal to 11.
Move the switch next to Enable row security to the Yes position to set row_security to on instead, allowing the user to dump the parts of the contents of the table that they have access to. This option is relevant only when dumping the contents of a table which has row security.
Use the Include table(s) and Children field to dump the tables and any partitions or inheritance child tables of the tables matching the pattern. Note: This option is visible only for database server greater than or equal to 16.
The Exclude patterns field is utilized to exclude patterns in the following manner:
Use the Table(s) field to not dump the tables matching the pattern. Multiple patterns can be given separated by space.
Use the Table(s) data field to not dump data for any tables matching the pattern. Multiple patterns can be given separated by spaces.
Use the Table(s) and children field to not dump the tables and any partitions or inheritance child tables of the tables matching the pattern. Note: This option is visible only for database server greater than or equal to 16.
Use the Table(s) data and children field to not dump data for the tables and any partitions or inheritance child tables of the tables matching the table pattern. Note: This option is visible only for database server greater than or equal to 16.
Click the Options tab to continue. Use the fields in the Options tab to provide other backup options.
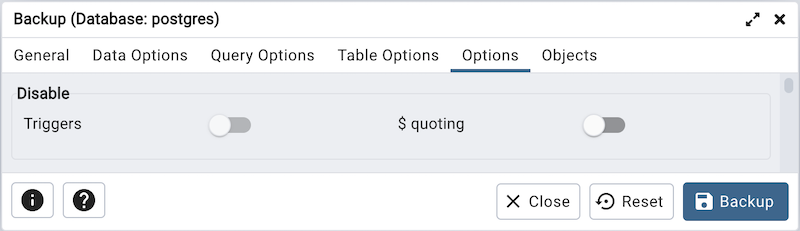
Move switches in the Disable field box to specify the type of statements that should be excluded from the backup.
Move the switch next to Triggers (active when creating a data-only backup) to the Yes position to include commands that will disable triggers on the target table while the data is being loaded.
Move the switch next to $ quoting to the Yes position to enable dollar quoting within function bodies; if disabled, the function body will be quoted using SQL standard string syntax.
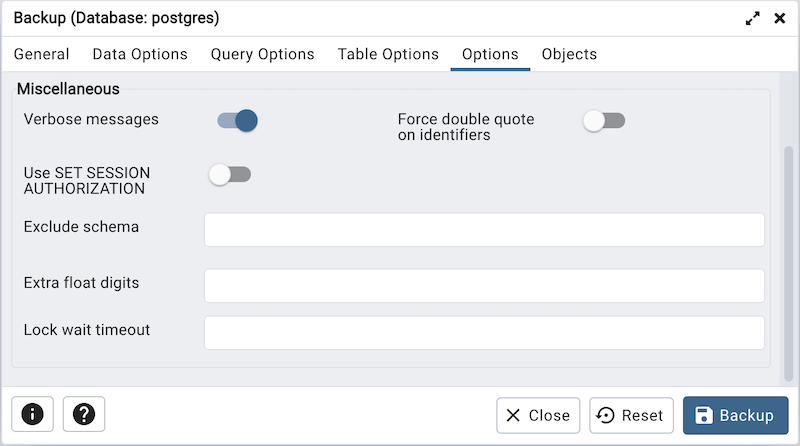
Move switches in the Miscellaneous field box to specify miscellaneous backup options.
Move the switch next to Verbose messages to the No position to instruct pg_dump to exclude verbose messages.
Move the switch next to Force double quotes on identifiers to the Yes position to force the quoting of all identifiers.
Move the switch next to Use SET SESSION AUTHORIZATION to the Yes position to include a statement that will use a SET SESSION AUTHORIZATION command to determine object ownership (instead of an ALTER OWNER command).
Use the Exclude schema field to not dump schemas whose name matches pattern.
Use the Extra float digits field to use the specified value when dumping floating-point data, instead of the maximum available precision.
Use the Lock wait timeout field to specify a timeout rather than waiting indefinitely to acquire shared table locks at the beginning of the dump. If unable to lock a table within the specified timeout, the operation will fail.
Click the Objects tab to continue.
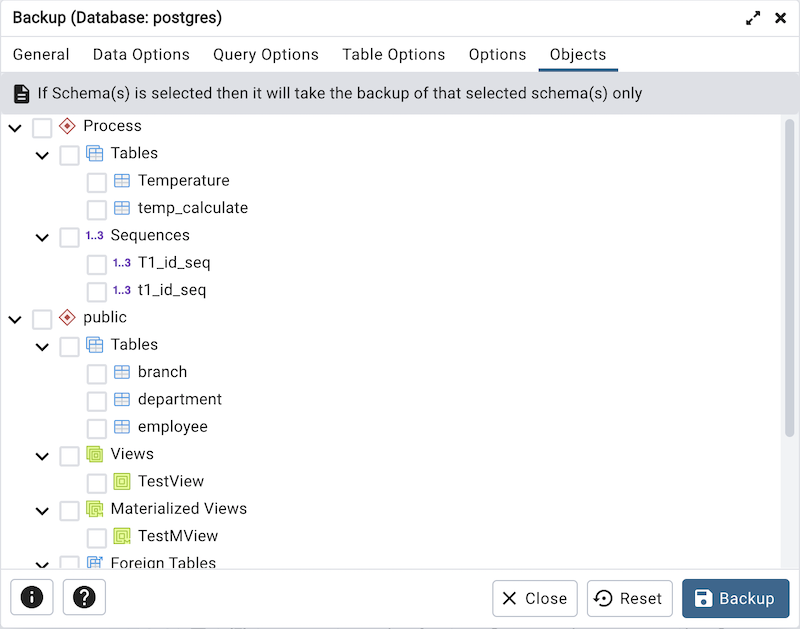
- Select the objects from tree to take backup of selected objects only.
If Schema is selected then it will take the backup of that selected schema only.
If any Table, View, Materialized View, Sequences, or Foreign Table is selected then it will take the backup of those selected objects.
When you’ve specified the details that will be incorporated into the pg_dump command:
Click the Backup button to build and execute a command that builds a backup based on your selections on the Backup dialog.
Click the Cancel button to exit without saving work.
pgAdmin will run the backup process in the background. You can view all the background processes with their running status and logs on the Processes tab.