Restore Dialog
The Restore dialog provides an easy way to use a Custom, tar, or Directory format backup taken with the pgAdmin Backup dialog to recreate a database or database object. The Backup dialog invokes options of the pg_dump client utility; the Restore dialog invokes options of the pg_restore client utility.
You can use the Query Tool to play back the script created during a plain-text backup made with the Backup dialog. For more information about backing up or restoring, please refer to the documentation for pg_dump or pg_restore.
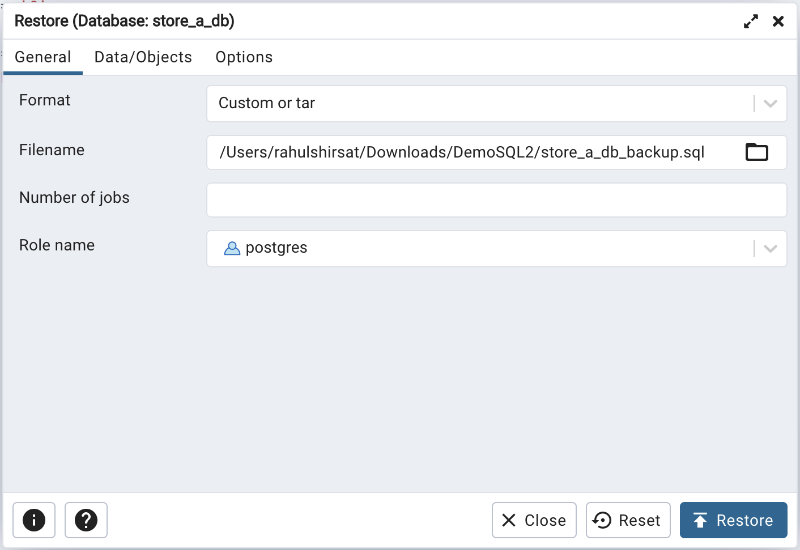
Use the fields on the General tab to specify general information about the restore process:
Use the drop-down listbox in the Format field to select the format of your backup file.
Select Custom or tar to restore from a custom archive file to create a copy of the backed-up object.
Select Directory to restore from a compressed directory-format archive.
Enter the complete path to the backup file in the Filename field. Optionally, select the Browser icon (ellipsis) to the right to navigate into a directory and select the file that contains the archive.
Use the Number of Jobs field to specify if pg_restore should use multiple (concurrent) jobs to process the restore. Each job uses a separate connection to the server.
Use the drop-down listbox next to Rolename to specify the role that will be used to authenticate with the server during the restore process.
Click the Data/Objects tab to continue. Use the fields on the Data/Objects tab to specify options related to data or pgAdmin objects that correspond to pg_restore options.
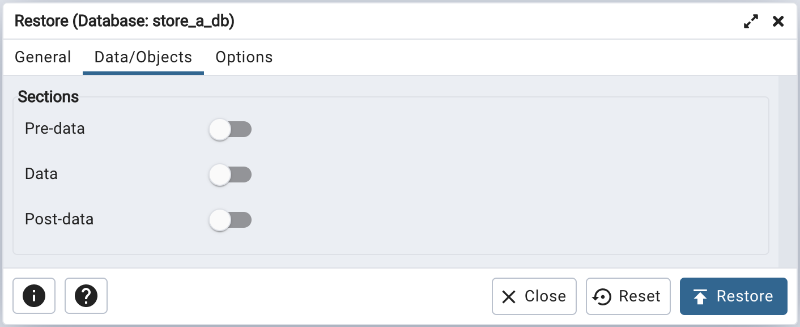
Use the switches in the Sections box to specify the content that will be restored:
Move the switch next to Pre-data towards right position to restore all data definition items not included in the data or post-data item lists.
Move the switch next to Data towards right position to restore actual table data, large-object contents, and sequence values.
Move the switch next to Post-data towards right position position to restore definitions of indexes, triggers, rules, and constraints (other than validated check constraints).
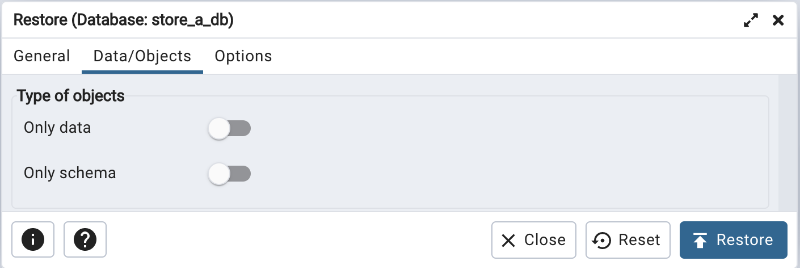
Use the switches in the Type of objects box to specify the objects that will be restored:
Move the switch next to Only data towards right position to limit the restoration to data.
Move the switch next to Only schema to limit the restoration to schema-level database objects.

Use the switches in the Do not save box to specify which objects will not be restored:
Move the switch next to Owner towards right position to exclude commands that set object ownership.
Move the switch next to Privilege towards right position to exclude commands that create access privileges.
Move the switch next to Tablespace towards right position to exclude tablespaces.
Move the switch next to Comments towards right position to exclude commands that set the comments. Note: This option is visible only for database server greater than or equal to 11.
Click the Options tab to continue. Use these additional fields to specify options like cleaning before restore, verbose message or using set session authorization that correspond to pg_restore options.
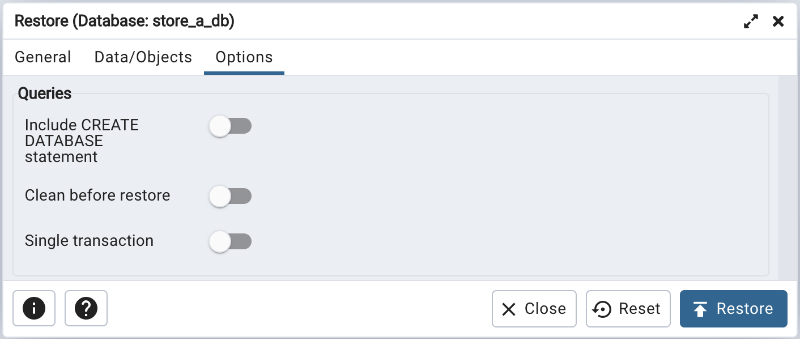
Use the switches in the Queries box to specify the type of statements that should be included in the restore:
Move the switch next to Include CREATE DATABASE statement towards right position to include a command that creates a new database before performing the restore.
Move the switch next to Clean before restore towards right position to drop each existing database object (and data) before restoring.
Move the switch next to Single transaction towards right position to execute the restore as a single transaction (that is, wrap the emitted commands in BEGIN/COMMIT). This ensures that either all the commands complete successfully, or no changes are applied. This option implies –exit-on-error.
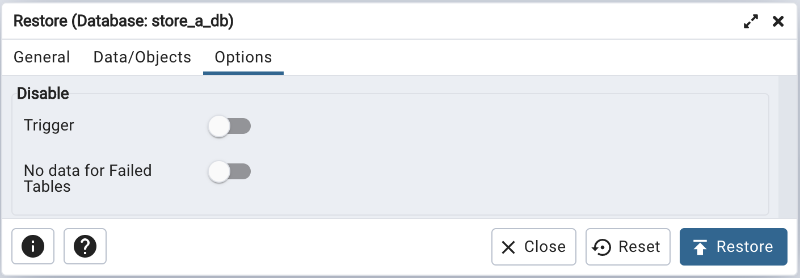
Use the switches in the Disable box to specify the type of statements that should be excluded from the restore:
Move the switch next to Trigger (active when creating a data-only restore) towards right position to include commands that will disable triggers on the target table while the data is being loaded.
Move the switch next to No data for Failed Tables towards right position to ignore data that fails a trigger.
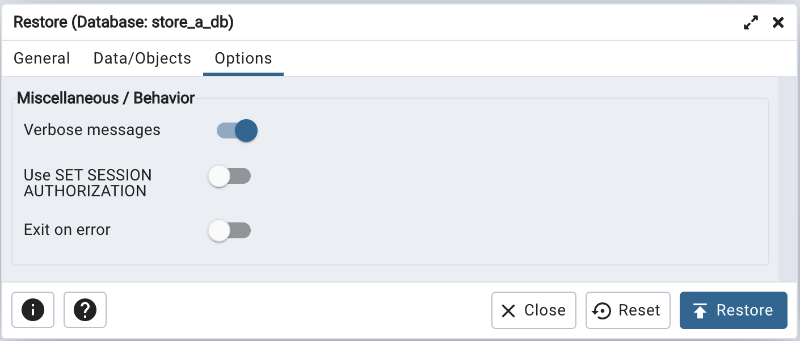
Use the switches in the Miscellaneous/Behavior box to specify miscellaneous restore options:
Move the switch next to Verbose messages towards left to instruct pg_restore to exclude verbose messages.
Move the switch next to Use SET SESSION AUTHORIZATION towards right position to include a statement that will use a SET SESSION AUTHORIZATION command to determine object ownership (instead of an ALTER OWNER command).
Move the switch next to Exit on error towards right position to instruct pg_restore to exit restore if there is an error in sending SQL commands. The default is to continue and to display a count of errors at the end of the restore.
When you’ve specified the details that will be incorporated into the pg_restore command, click the Restore button to start the process, or click the Cancel button to exit without saving your work. A popup will confirm if the restore is successful.
pgAdmin will run the restore process in background. You can view all the background process with there running status and logs on the Processes tab