Index Dialog
Use the Index dialog to create an index on a specified table or materialized view.
The Index dialog organizes the development of a index through the following dialog tabs: General, Definition, and Columns. The SQL tab displays the SQL code generated by dialog selections.
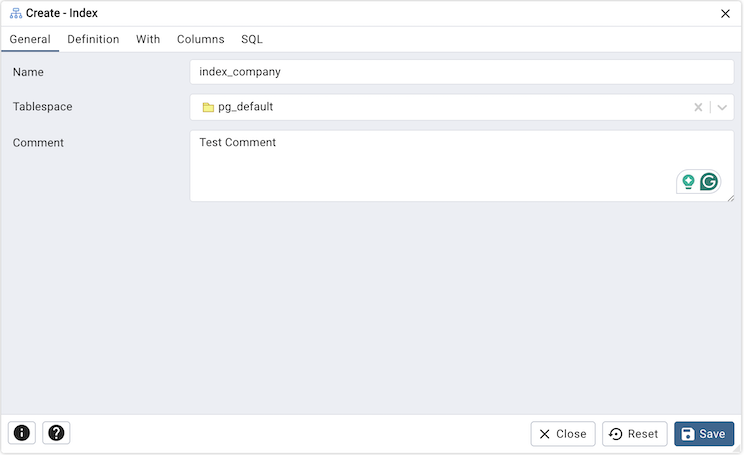
Use the fields in the General tab to identify the index:
Use the Name field to add a descriptive name for the index. The name will be displayed in the pgAdmin tree control.
Use the drop-down listbox next to Tablespace to select the tablespace in which the index will reside.
Store notes about the index in the Comment field.
Click the Definition tab to continue.
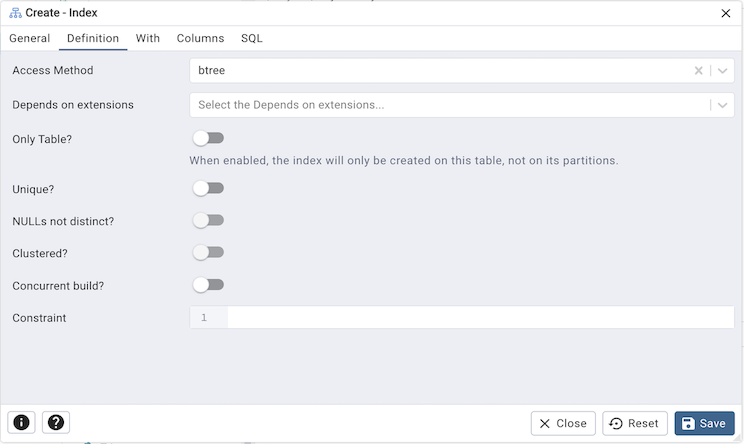
Use the fields in the Definition tab to define the index:
Use the drop-down listbox next to Access Method to select an index type:
Select btree to create a B-tree index. A B-tree index may improve performance when managing equality and range queries on data that can be sorted into some ordering (the default).
Select hash to create a hash index. A hash index may improve performance when managing simple equality comparisons.
Select gist to create a GiST index. A GiST index may improve performance when managing two-dimensional geometric data types and nearest-neighbor searches.
Select gin to create a GIN index. A GIN index may improve performance when managing values with more than one key.
Select spgist to create a space-partitioned GiST index. A SP-GiST index may improve performance when managing non-balanced data structures.
Select brin to create a BRIN index. A BRIN index may improve performance when managing minimum and maximum values and ranges.
Use the drop-down listbox next to Depends on extensions to select the extension that this index depends on (for example, edbspl). If set, dropping the extension will automatically drop the index as well.
Move the switch next to Only Table? to the Yes position to create the index only on the parent table without recursing to its partitions. This button will be enabled for partition tables only. The default is No.
Move the switch next to Unique? to the Yes position to check for duplicate values in the table when the index is created and when data is added. The default is No.
Move the switch next to NULLs not distinct? to the Yes position to treat null values as not distinct. The default is No. This option is available only on PostgreSQL 15 and above.
Move the Clustered? switch to the Yes position to instruct the server to cluster the table.
Move the Concurrent build? switch to the Yes position to build the index without taking any locks that prevent concurrent inserts, updates, or deletes on the table.
Use the Constraint field to provide a constraint expression; a constraint expression limits the entries in the index to those rows that satisfy the constraint.
Click the With tab to continue.
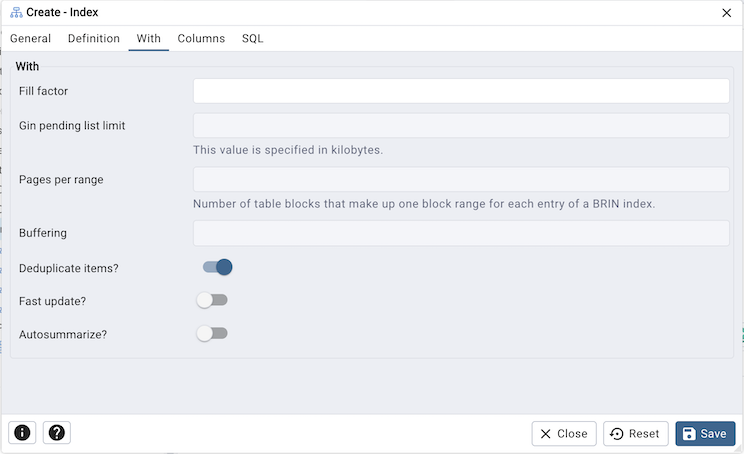
Use the Fill Factor field to specify a fill factor for the index. The fill factor specifies how full the selected method will try to fill each index page.
Use the Gin pending list limit field to specify the maximum size of a GIN index’s pending list, which is used when fastupdate is enabled. This value is specified in kilobytes.
Use the Pages per range field to specify the number of table blocks that make up one block range for each entry of a BRIN index.
Select Buffering to specify whether the buffering build technique is used to build the index. The default is Auto
Move the switch next to Deduplicate items? to the Yes position to control usage of the B-tree deduplication technique. The default is Yes. This option is available only on PostgreSQL 13 and above.
Move the switch next to Fast update? to the Yes position to control usage of the fast update technique. The default is Yes.
Move the switch next to Autosummarize to the Yes position to define whether a summarization run is queued for the previous page range whenever an insertion is detected on the next one. The default is No
Click the Columns tab to continue.
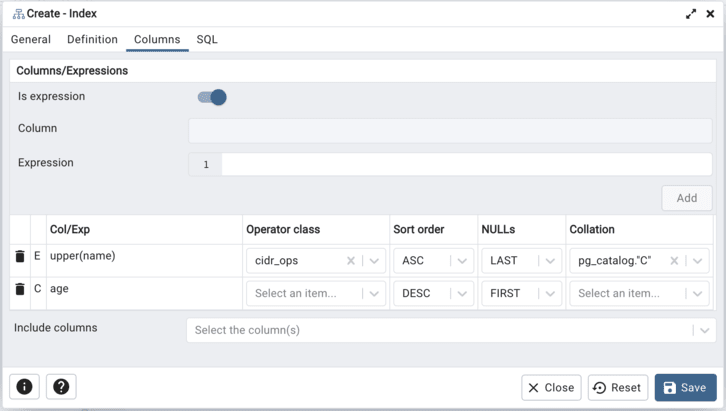
Use the fields in the Columns tab to specify which column(s) or expression(s) the index queries. Use the Is expression ? switch to enable expression sql input. Use the drop-down listbox next to Column to select a column. Once the Column is selected or the Expression is entered then click the Add icon (+) to provide details of the action on the column/expression:
The Col/Exp field is populated with the selection made in the Column drop-down listbox or the Expression entered.
If enabled, use the drop-down listbox to select an available Operator class to specify the type of action performed on the column.
If enabled, use the drop-down listbox to select Sort order:
Select ASC to specify an ascending sort order (the default);
Select DESC to specify a descending sort order.
If enabled, use the drop-down listbox to select Nulls:
Select First to specify nulls sort before non-nulls;
Select Last to specify nulls sort after non-nulls (the default).
Use the drop-down listbox in the Collation field to select a collation to use for the index.
Use Include columns field to specify columns for INCLUDE clause of the constraint. This option is available in Postgres 11 and later.
Click the SQL tab to continue.
Your entries in the Index dialog generate a SQL command (see an example below). Use the SQL tab for review; revisit or switch tabs to make any changes to the SQL command.
Example
The following is an example of the sql command generated by user selections in the Index dialog:

The example shown demonstrates creating an index named index_sal that indexes the values in the job column of the jobhist table.
Click the Info button (i) to access online help.
Click the Save button to save work.
Click the Close button to exit without saving work.
Click the Reset button to restore configuration parameters.