Import/Export Data Dialog
Use the Import/Export data dialog to copy data from a table to a file, or copy data from a file into a table.
The Import/Export data dialog organizes the import/export of data through the General, Options and Columns tabs.
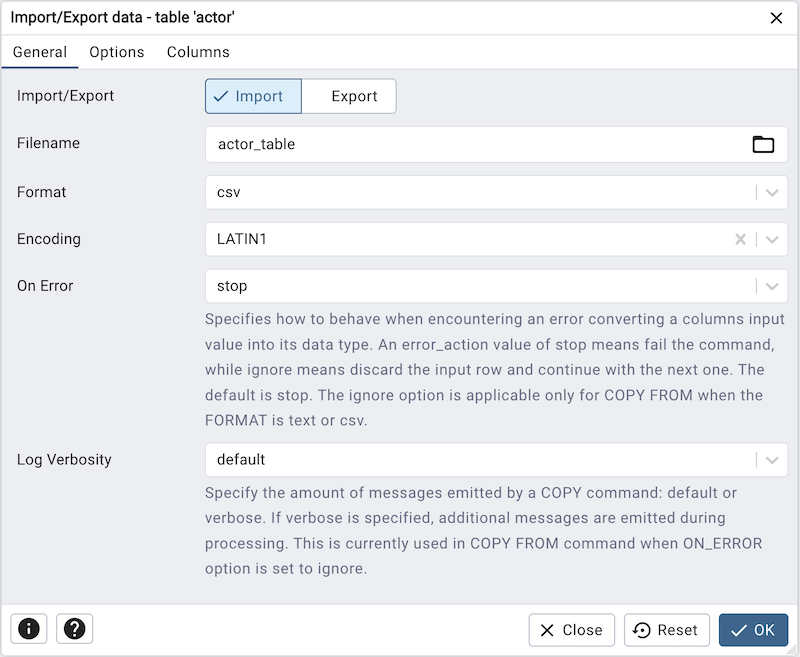
Use the fields in the General tab to specify import and export preferences:
Move the Import/Export switch to the Import position to specify that the server should import data to a table from a file. The default is Import.
Enter the name of the source or target file in the Filename field. Optionally, select the Browse icon (ellipsis) to the right to navigate into a directory and select a file.
Use the drop-down listbox in the Format field to specify the file type. Select:
binary for a .bin file.
csv for a .csv file.
text for a .txt file.
Use the drop-down listbox in the Encoding field to specify the type of character encoding.
use the drop-down listbox in the On Error field to specify how to behave when encountering an error converting a columns input value into its data type. An error_action value of stop means fail the command, while ignore means discard the input row and continue with the next one. The default is stop. This option is available from PG/EPAS version 17 and above.
use the drop-down listbox in the Log Verbosity field to specify the amount of messages emitted by a COPY command: default or verbose. This is currently used in Import only when ON_ERROR option is set to ignore. This option is available from PG/EPAS version 17 and above.
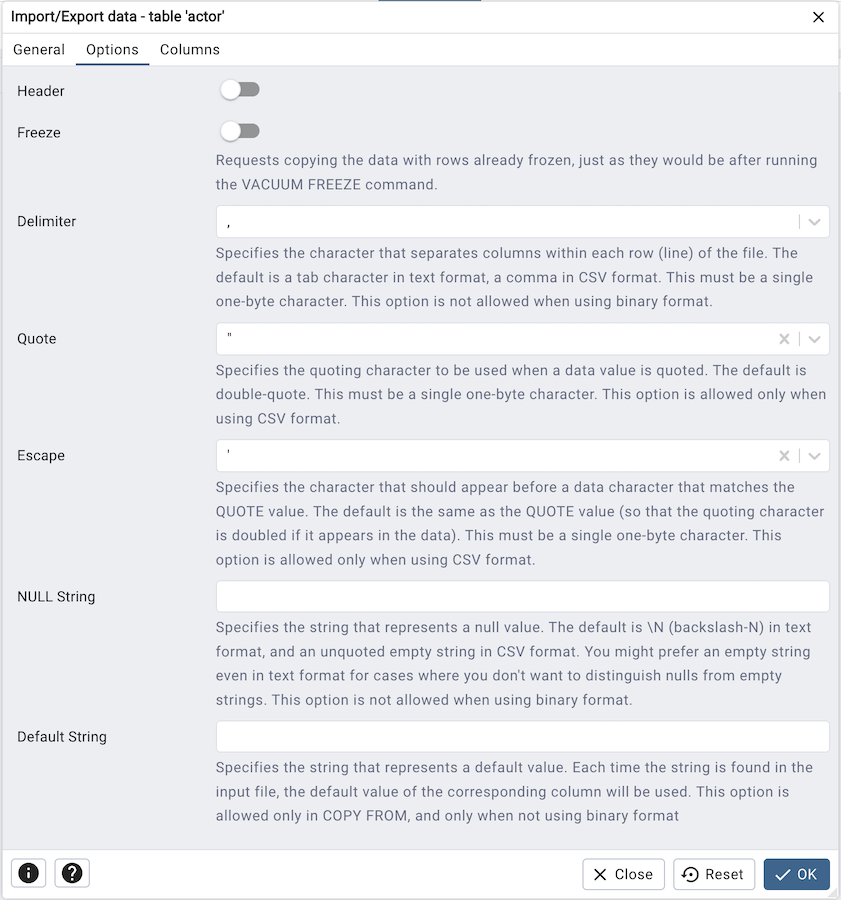
Use the fields in the Options tab to specify additional information:
Move the Header switch to the Yes position to include the table header with the data rows. If you include the table header, the first row of the file will contain the column names.
Move the Freeze switch to the Yes position to requests copying the data with rows already frozen, just as they would be after running the VACUUM FREEZE command.
If you are exporting data, specify the delimiter that will separate the columns within the target file in the Delimiter field. The separating character can be a colon, semicolon, a vertical bar, or a tab.
Specify a quoting character used in the Quote field. Quoting can be applied to string columns only (i.e. numeric columns will not be quoted) or all columns regardless of data type. The character used for quoting can be a single quote or a double quote.
Specify a character that should appear before a data character that matches the QUOTE value in the Escape field.
Use the NULL String field to specify a string that will represent a null value within the source or target file.
Use the Default String field to specify a string that will represent a default value. Each time the string is found in the input file, the default value of the corresponding column will be used. This option is available from PG/EPAS version 16 and above.
Click the Columns tab to continue.
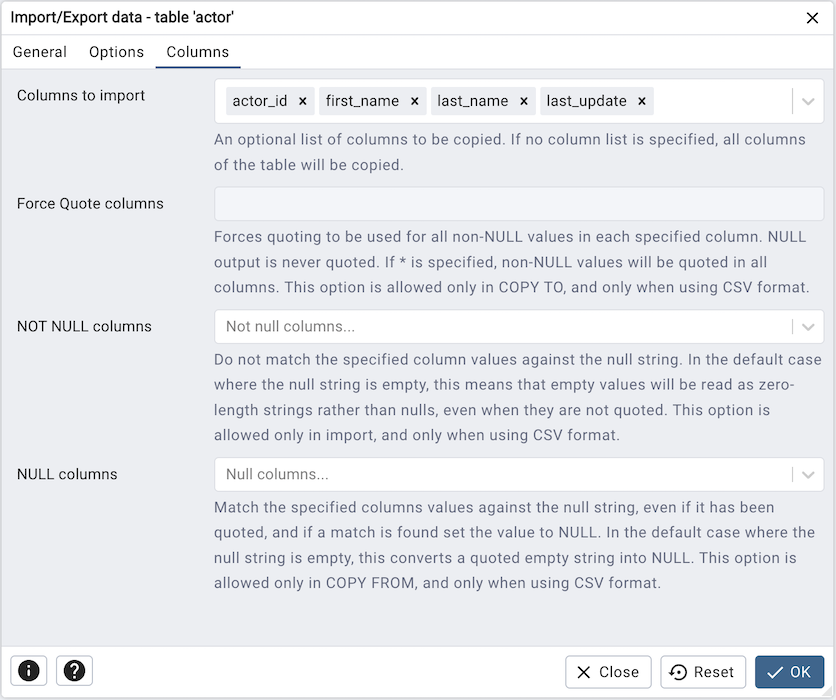
Use the fields in the Columns tab to select the columns that will be imported or exported:
Click inside the Columns to export/import field to deselect one or more columns from the drop-down listbox. To delete a selection, click the x to the left of the column name. Click an empty spot inside the field to access the drop-down list.
If enabled, click inside the Force Quote columns field to forces quoting to be used for all non-NULL values in each specified column. NULL output is never quoted. To delete a column, click the x to the left of the column name.
If enabled, click inside the NOT NULL columns field to select one or more columns that will not be checked for a NULL value. To delete a column, click the x to the left of the column name.
If enabled, click inside the NULL columns field to match the specified columns values against the null string, even if it has been quoted, and if a match is found set the value to NULL. To delete a column, click the x to the left of the column name.
After completing the Import/Export data dialog, click the OK button to perform the import or export. pgAdmin will notify you when the background process completes:
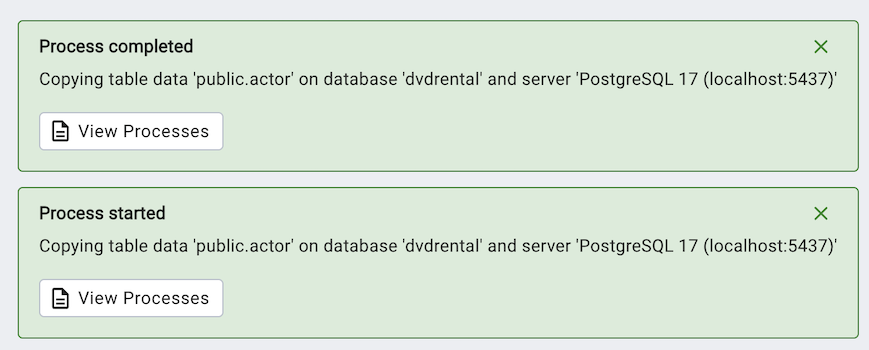
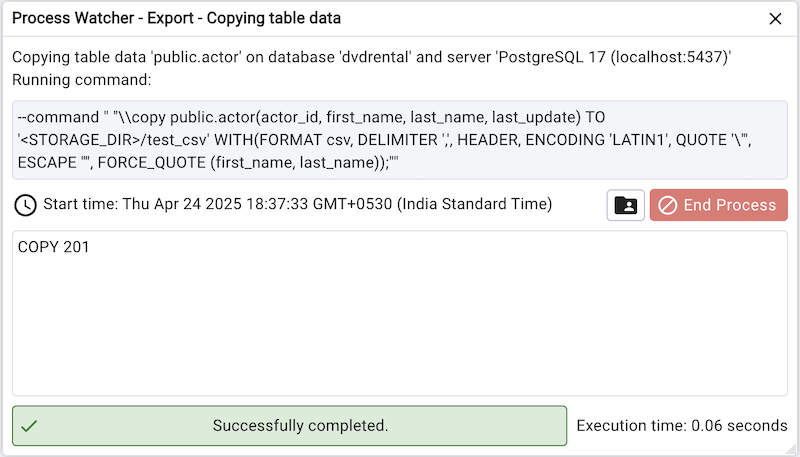
Use the View Processes button on the notification to open the Process Watcher and review detailed information about the execution of the command that performed the import or export:
Use the End Process button to end the Import/Export process.
Note
If you are running pgAdmin in Server Mode you can click on the ![]() icon in the process watcher window to open the file location in the Storage Manager. You can use the Storage Manager to download the exported file on the client machine .
icon in the process watcher window to open the file location in the Storage Manager. You can use the Storage Manager to download the exported file on the client machine .